In this example, we are going to learn about how we can neatly handle navigation stack when user is logging in or out (i.e Clearing all the screens from the navigation stack and inserting a new one) and also add some awesome transition effect.
Okay so let’s start by creating by creating some screens first.
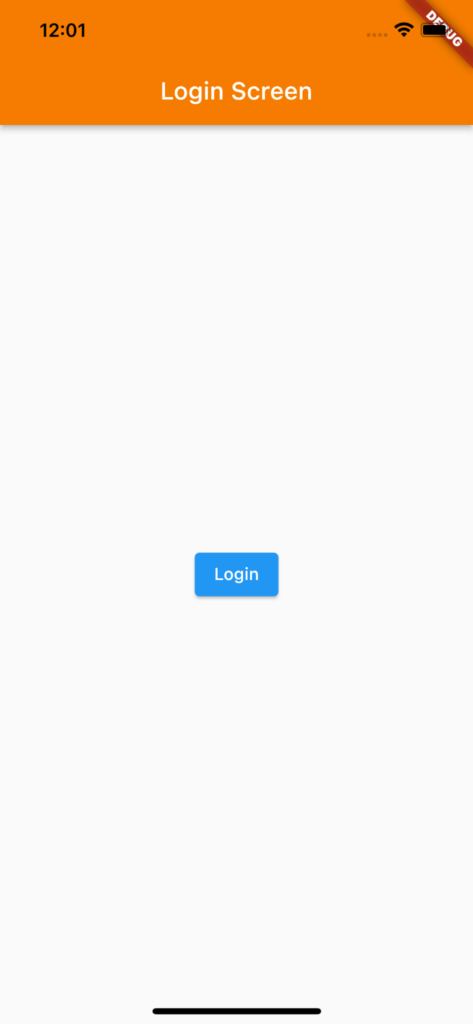
Login Screen
Here we created a basic StatelessWidget named LoginScreen which contains an appbar and a Login button at center of the screen. When user clicks on the login button we want to navigate user to the HomeScreen.
/// Login Screen
class LoginScreen extends StatelessWidget {
  const LoginScreen({Key? key}) : super(key: key);

  Future<void> _login(BuildContext context) {
    /// TODO: Implement Login Action
  }

  @override
  Widget build(BuildContext context) {
    return Scaffold(
      appBar: AppBar(
        title: const Text('Login Screen'),
        backgroundColor: Colors.orange[700],
      ),
      body: Center(
        child: ElevatedButton(
          onPressed: () => _login(context),
          child: const Text('Login'),
        ),
      ),
    );
  }
}
Output (Login Screen)
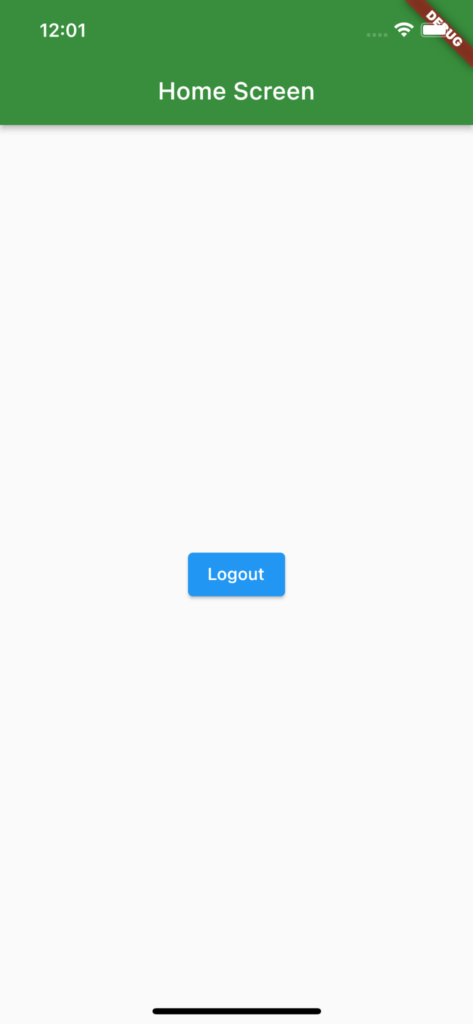
Home Screen
Here we created a basic StatelessWidget named HomeScreen which contains an appbar and a Logout button at center of the screen. When user clicks on the logout button we want to navigate user to the LoginScreen.
/// Login Screen
/// Home Screen
class HomeScreen extends StatelessWidget {
  const HomeScreen({Key? key}) : super(key: key);

  Future<void> _logout(BuildContext context) {
    /// TODO: Implement Logout Action
  }

  @override
  Widget build(BuildContext context) {
    return Scaffold(
      appBar: AppBar(
        title: const Text('Home Screen'),
        backgroundColor: Colors.green[700],
      ),
      body: Center(
        child: ElevatedButton(
          onPressed: () => _logout(context),
          child: const Text('Logout'),
        ),
      ),
    );
  }
}
Output (Home Screen)
Navigation Logic
Login Flow
Now let’s implement the _login() action to navigate user to the HomeScreen.
/// Navigate user to the [HomeScreen]. It will pop all the screens from the navigation stack and then pushes [HomeScreen]
Future<void> _login(BuildContext context) {
   return Navigator.pushAndRemoveUntil(
     context,
     MaterialPageRoute(
       builder: (context) => const HomeScreen(),
     ),
     (route) => false,
   );
 }
Here for _login() action we are using Navigator.pushAndRemoveUntil. This takes 3 arguments
- It takes the current context of the widget.
- It takes the Screen (Widget) to which you want to navigate
- It takes a conditional boolean value. Which will decide what no.of screens do we need to remove from the navigation stack. Here we have return false which means we need to remove all the screen from the navigation stack and insert a new screen on to the top
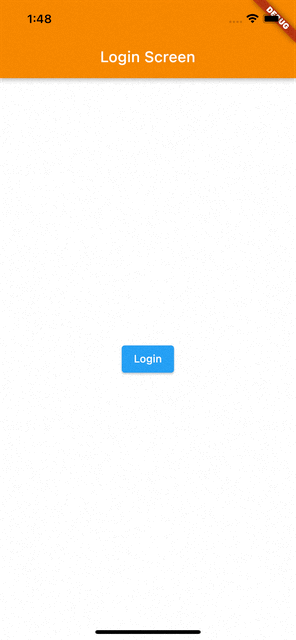
Logout Flow
Now let’s implement the _logout() action to navigate user back to the LoginScreen with some awesome transition. Here the navigation transition is different for iOS and Android platform. For iOS platform LoginScreen will be slide in from the bottom to the top and for Android platform we will have simple material transition.
/// It provides transition animation when navigating.
/// For [Platform.isIOS] it will return [SlideTransition] and for other platforms it will return [MaterialPageRoute]
PageRoute _page() {
  if (!kIsWeb && Platform.isIOS) {
    return PageRouteBuilder(
      pageBuilder: (context, animation, secondaryAnimation) => const LoginScreen(),
      transitionsBuilder: (context, animation, secondaryAnimation, child) {
        const begin = Offset(0.0, 1.0);
        const end = Offset.zero;
        const curve = Curves.ease;

        var tween = Tween(begin: begin, end: end).chain(CurveTween(curve: curve));

        return SlideTransition(
          position: animation.drive(tween),
          child: child,
        );
      },
    );
  }

  return MaterialPageRoute(
    builder: (context) => const LoginScreen(),
  );
}
/// Navigate user to the [LoginScreen]. It will pop all the screens from the navigation stack and then pushes [LoginScreen]
Future<void> _logout(BuildContext context) {
  return Navigator.pushAndRemoveUntil(
    context,
    _page(),
    (route) => false,
  );
}
Here for _logout() action we are using same Navigator.pushAndRemoveUntil that we used in LoginScreen but here we have made some changes like we are not directly returning the MaterialPageRoute for navigating to LoginScreen.
As we want different transition effect for different platforms. We are using conditional code in _page() method i.e We are returning simple MaterialPageRoute if it is not a iOS platform and if it is iOS platform we are returning a PageRouteBuilder which takes 2 arguments
1. pageBuilder: It takes the Screen (Widget) to which you want to navigate
2. transitionsBuilder: Here we have defined the begin and end offset of transition and used some built-in animation classes like Tween (For animation position), CurveTween (For animation type i.e Curve.ease) and SlideTransition (For render the animation on the device). This all combining will create a slide in animation from bottom of the screen to the top
Final Output (iOS)
Final Output (Android)

Support On Demand!