Quick Summary
The process of React Rendering and how it works. Which React render type suits your application the most, and what’s the best way to leverage it? Moreover, go through the best practices to avoid mistakes that might hamper your software performance or user experience.
Table of Contents
Introduction
You spend thousands of dollars not to make your users abandon your website but to compel them to take some revenue-generating actions for you, right?
What if I tell you that even 3 seconds of the page loading time is intolerable for users? Yes, you read it right. Around 40% of users abandon websites that take 3 secs or more to load.
Worry no more; we have got your back. Bringing you the most efficient and declarative approach focused on React Rendering that makes page loading time lighting fast and lag-free.
But wait, what is React render? How does it work? You might be having such questions. Don’t worry; go through this article and make your user’s experience unforgettable.
So, let’s get started.
What is React Rendering?
React rendering is how React, a widely used JavaScript library for making user interfaces, updates the appearance and behavior of the website when information or situation changes. This updating process includes effectively adjusting the DOM (the web page’s internal structure) to show the most up-to-date application condition. When a React app starts, it has to go through the rendering phase to create a UI for the first time. To ensure that only the relevant portions of the program change in appearance, the app will rerun specific areas if any changes are required.
Now let’s further understand how rendering works in React.
React Rendering Process
There are 2 phases into which the rendering process is differentiated:
- Render Phase
- Commit Phase
Let’s look at each phase and some of the principles that govern them.
🟠 Render Phase
1. Initial Rendering and Re-rendering
Initial Render:
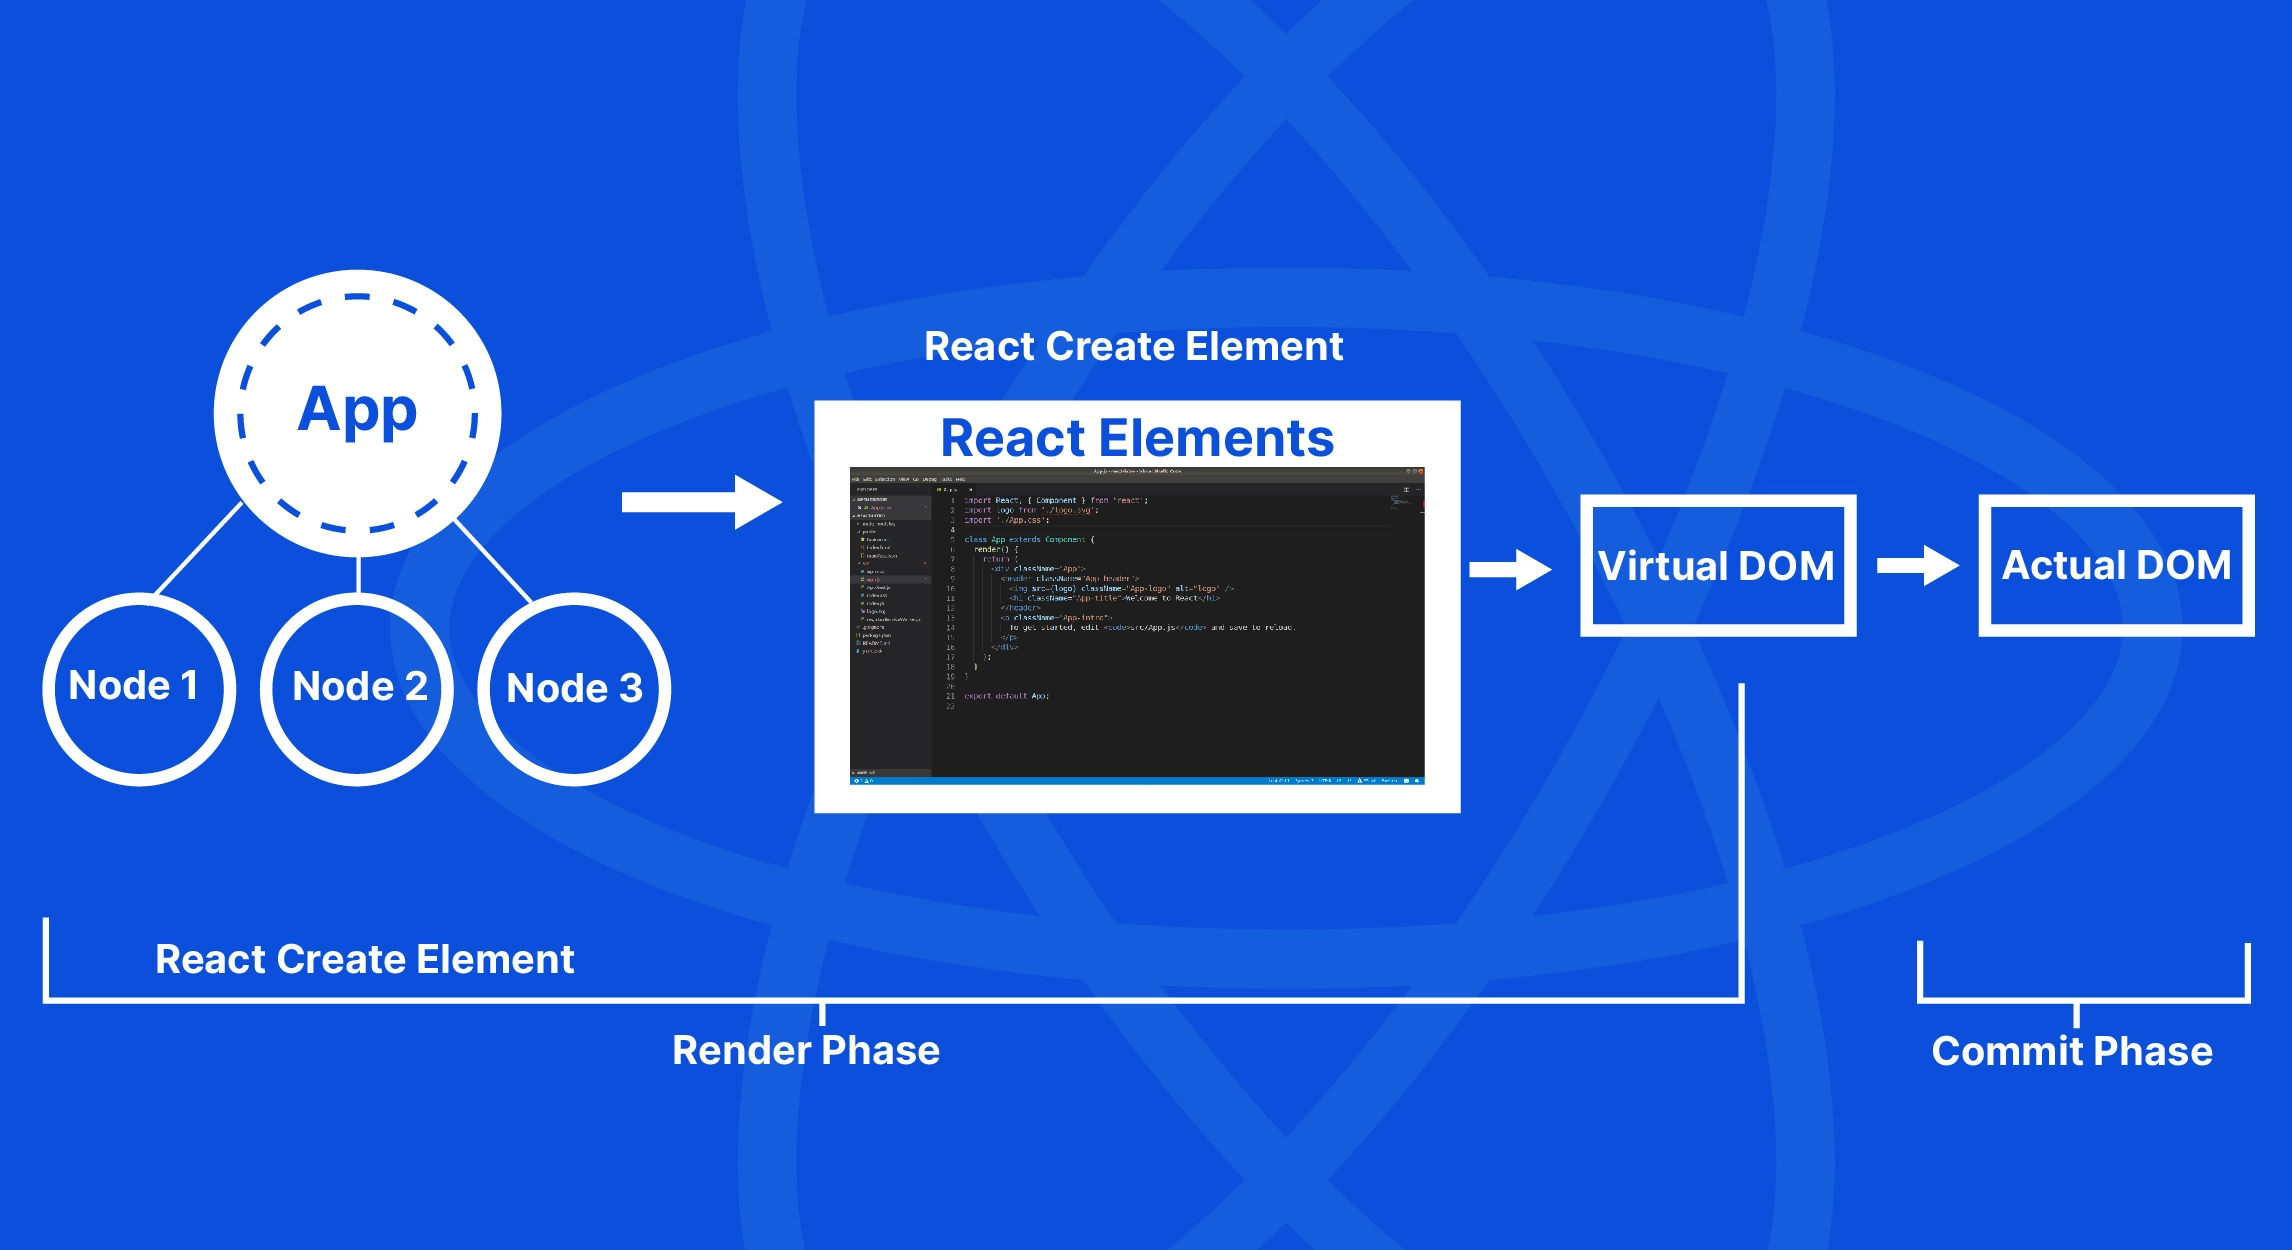
When you use React to build a web application, the first phase is called the “initial render.” Here, React takes all the instructions you have written in a unique format called JSX and translates them into JavaScript, representing what your web page should look like.
At the core of React is the most substantial part, called the “root” the starting point where the process begins. React works through your plan by adding building blocks for your web page, known as React elements. As React follows this procedure, it builds a tree of these elements representing the final webpage’s appearance.
The below mentioned will give you a brief idea of how the rendering process takes place for the initial rendering. Specifically, you will gain insights into how does React rendering work.

Re-rendering:
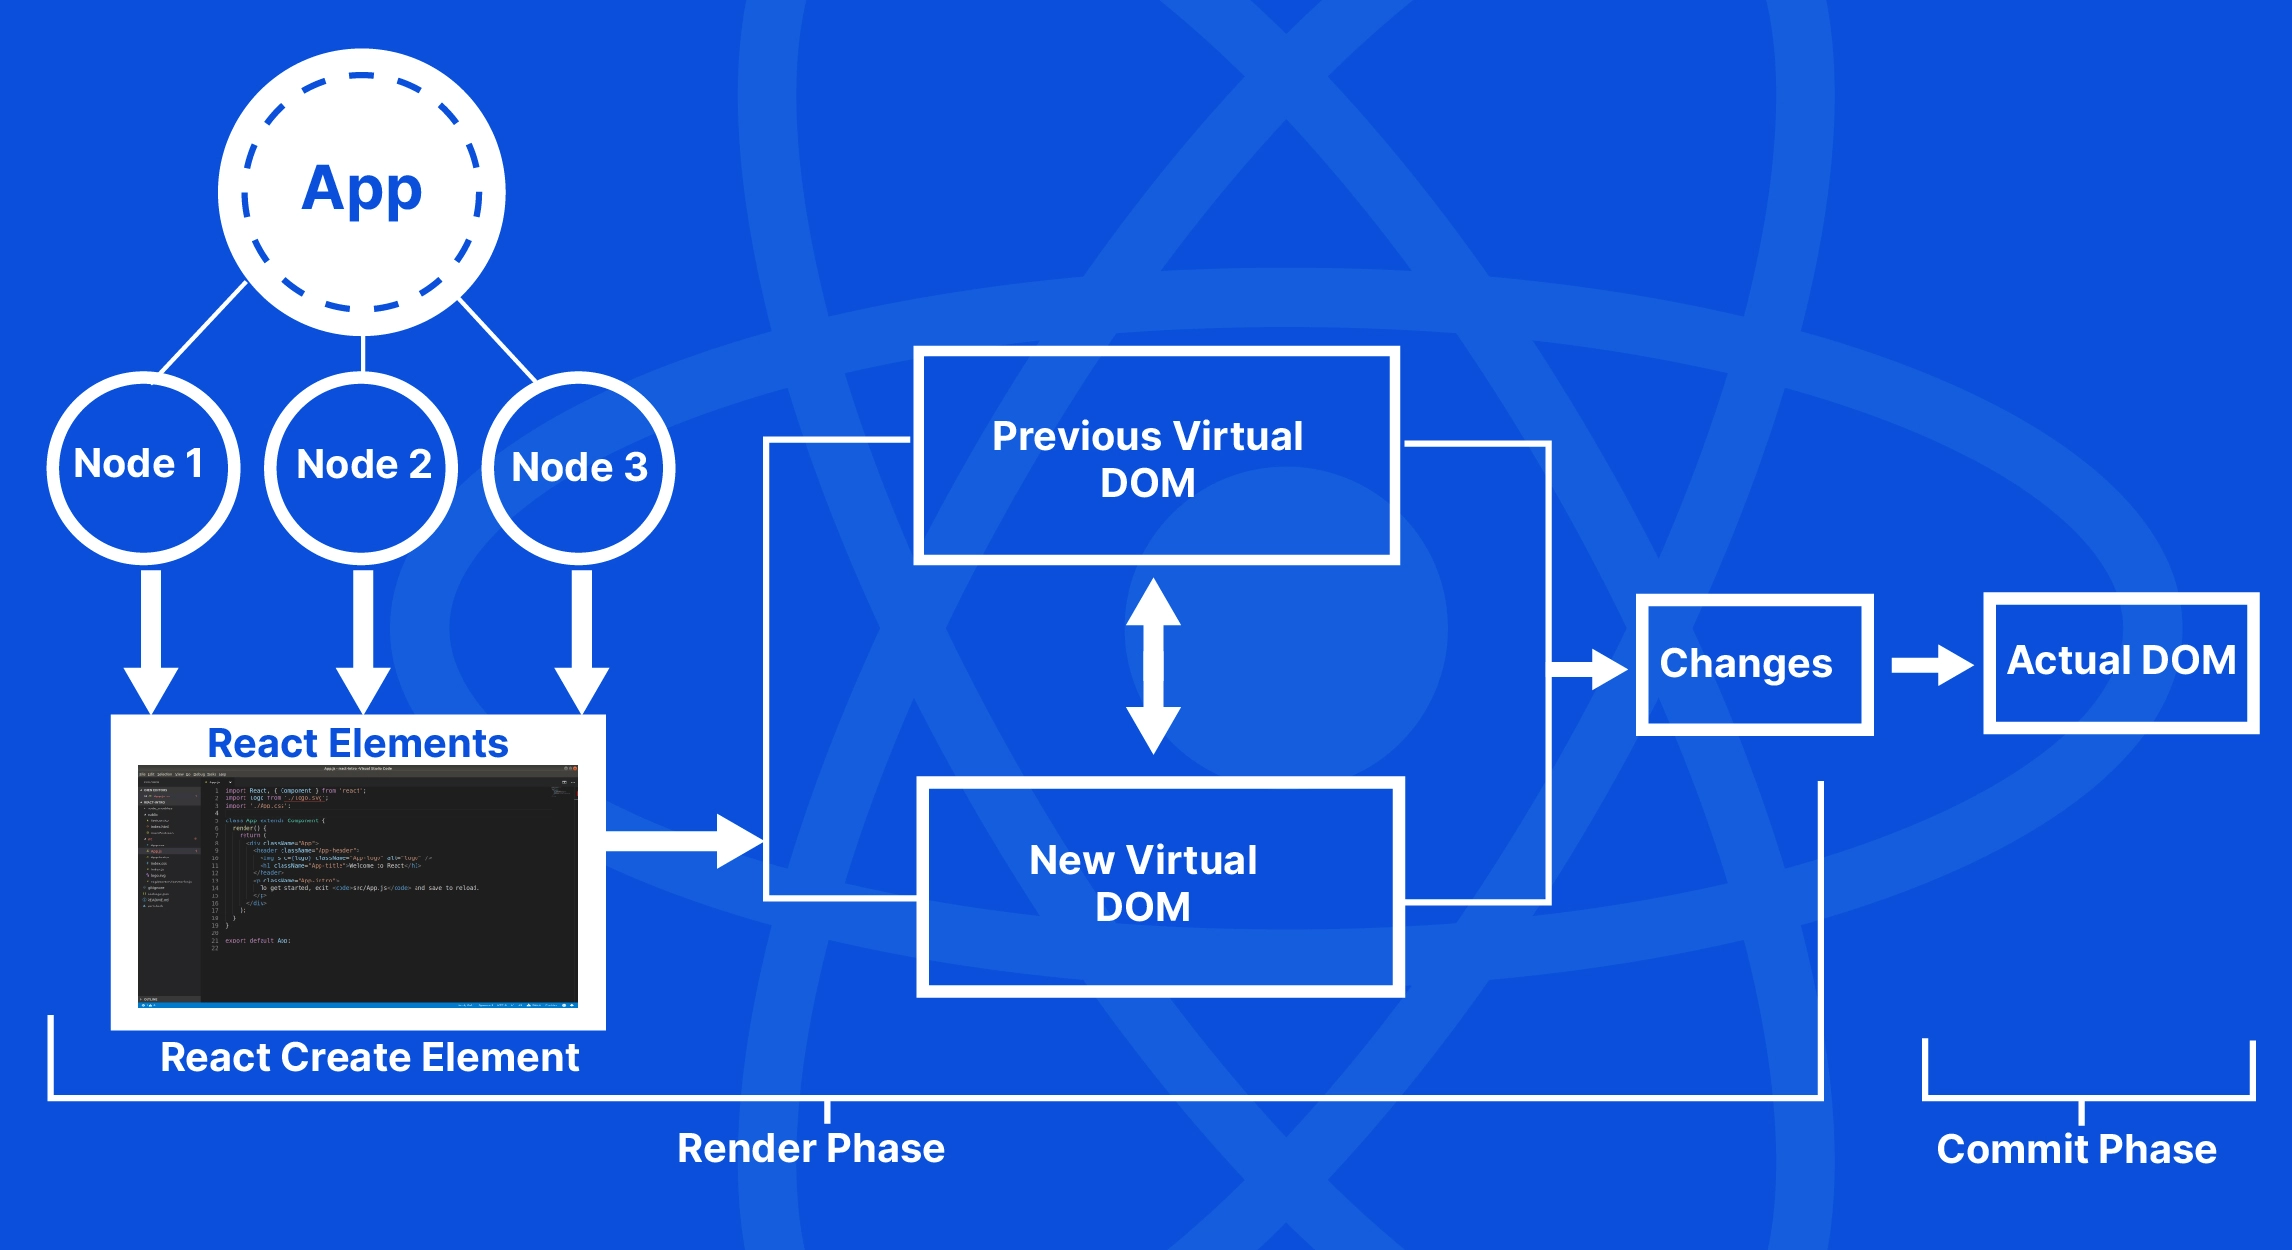
Imagine you set up a puzzle and wish to change a few pieces. In the world of React, this is called “re-rendering,” but with a twist. React not only replaces the changed pieces; instead, it creates a fresh plan in JavaScript tailored to changes.
Here’s how it works: React identifies the parts that need a change, labels them for updates, and compares them with the old plans, a process referred to as “ diffing,” which figures out which parts have been moved or changed via virtual DOM.
The image mentioned below will give you an idea of the rendering process when the application re-renders

2. The Virtual DOM
When you work with React, each time you create a component, React builds a previous version of your webpage, referred to as the “virtual DOM.” Now whenever a component is invoked, React generates this virtual DOM. Here React’s goal is to ensure the application’s UI syncs with the data. However, when a part of your web page changes, React must update the display to match the changes. It re-renders the components when their data (called state) changes.
Also, when the state of these component change in React, the component and its child components are re-rendered, ensuring everything is updated and accurate. Making changes to the actual page is time-consuming and costly, so React uses the virtual DOM, and only when needed it updates the actual web page just for the required parts.
3. Reconciliation
Reconciliation is an essential process during the transition between the two rendering phases. It ensures the virtual version of the web page (virtual DOM) matches the real DOM. As outlined earlier, during the initial rendering phase, the code written gets translated into React elements which are then placed onto the actual DOM through mounting. However, React generates new elements when any changes are made.
The next step is ensuring the new virtual elements match the real DOM. Re-rendering the actual DOM is expensive. Therefore, React compares the tree and leverages the “diffing Algorithm” to determine which tree needs to be changed the fewest times. This way, only the parts that need changing are updated.
The Diffing Algorithm works behind the scenes to smartly update the display to match the latest changes. It implements the O(n) algorithm, which is quick and feasible. It assumes that elements of different types create separate trees and suggests using unique keys as props for changing the list of child elements. Thus Reconciliation plays a crucial role in the React render process, aligning virtual and accurate web page versions for optimal updates.
🟠 The Commit Phase
The Commit Phase marks the stage where changes are made to the actual webpage you see on your screen. It’s a final touch-up after all the planning and comparisons are made. When the rendering is initiated, React uses a specialized function, ‘appendChild(),’ to place all the elements, such as text, images, and buttons, where they should be.
It must be noted, React itself does not communicate with the Real DOM. Instead, it relies on third-party tools called Renderers, like React DOM for websites and React Native for mobile apps. These tools handle the tasks to change the Real DOM.
Additionally, in React web projects, it’s a common practice to import the React DOM just once, primarily located in the index.js file. Subsequently, the ‘render’ method from the package is employed. React interacts with the renderer through hooks or various methods that manage components’ behavior during their lifecycle.
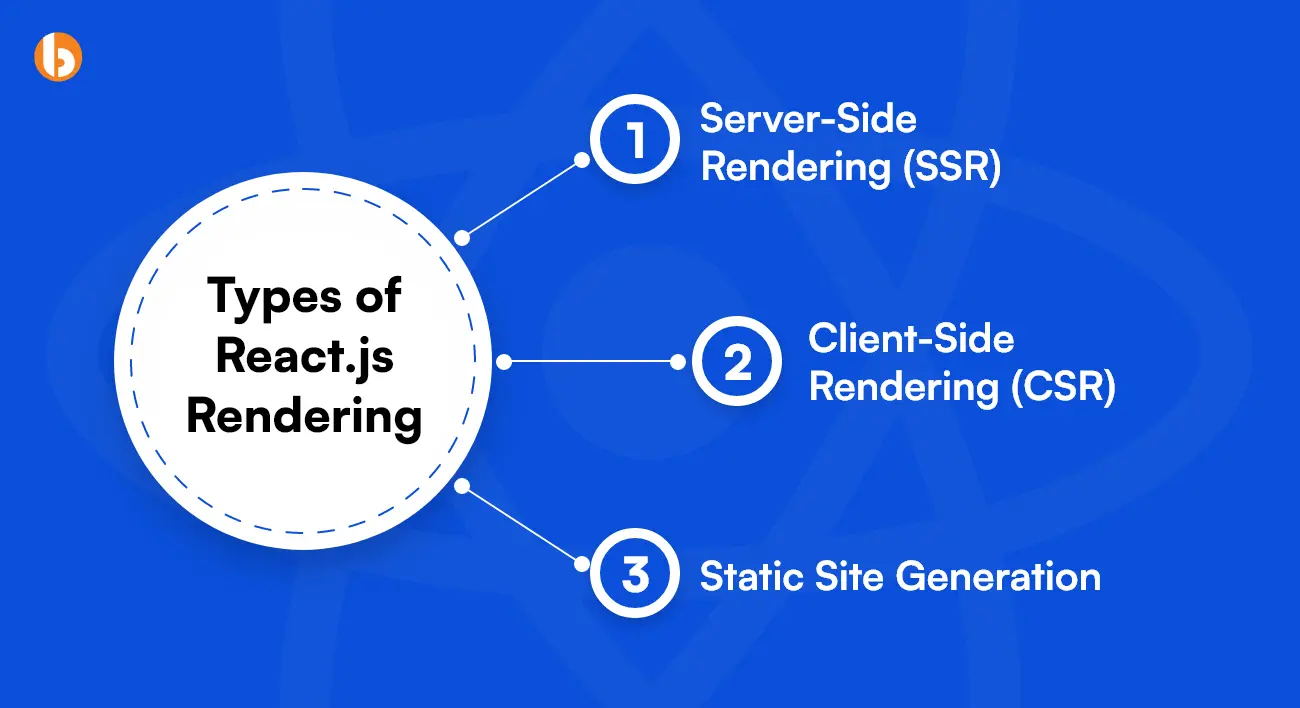
Types of React js Rendering
React rendering depends on different strategies. We have shared the names in the above section. Now, let’s understand the nitty-gritty of these strategies in detail.

Server-Side Rendering (SSR)
The server-side rendering is where the user doesn’t have to be involved in many manual tasks. React’s rendering process ensures generating all the HTML, CSS, and Javascript on the server and then sending them to the client side, making it a fundamental aspect of the rendering React process. The rendering process helps in saving time and making tasks more efficient than ever because the process eliminates the process of downloading, parsing, and rendering Javascript code to run the command.
Also, embracing React server-side rendering would benefit you from the SEO perspective since it enables easy crawling of the page content.
Client-Side Rendering (CSR)
Another rendering process by React is quite the inverse of server-side rendering. Here, the rendering process occurs on the client rather than the server. It happens in web development wherein the web server requests only a minimum of HTML, CSS, or Javascript to render the web page.
When the browser receives the data, it starts leveraging Javascript to create and display a web page on the user’s screen. It develops and enhances the user experience by enabling them to interact with the web page elements without refreshing the entire page. The only downfall of this rendering strategy is that it takes time when loading initially since the browser downloads and processes all the Javascript and CSS.
Static Site Generation
A static site is the process of proactive website creation and then sending the already created HTML, JavaScript, and CSS files to the user’s browser, keeping them as a static asset. It also means that all the content and structure of the website are pre-rendered and stored, marking it as static assets. And it would be delivered to users quickly as and when required.
Those websites that do not require updates can leverage static site generation. It includes blogs and small business websites. Static-side generated websites are far better than client or server-side rendered websites.
Unlock new possibilities and push the boundaries of your React application
Embrace the power of React rendering and deliver seamless and engaging user experiences with the help of our experienced React developers
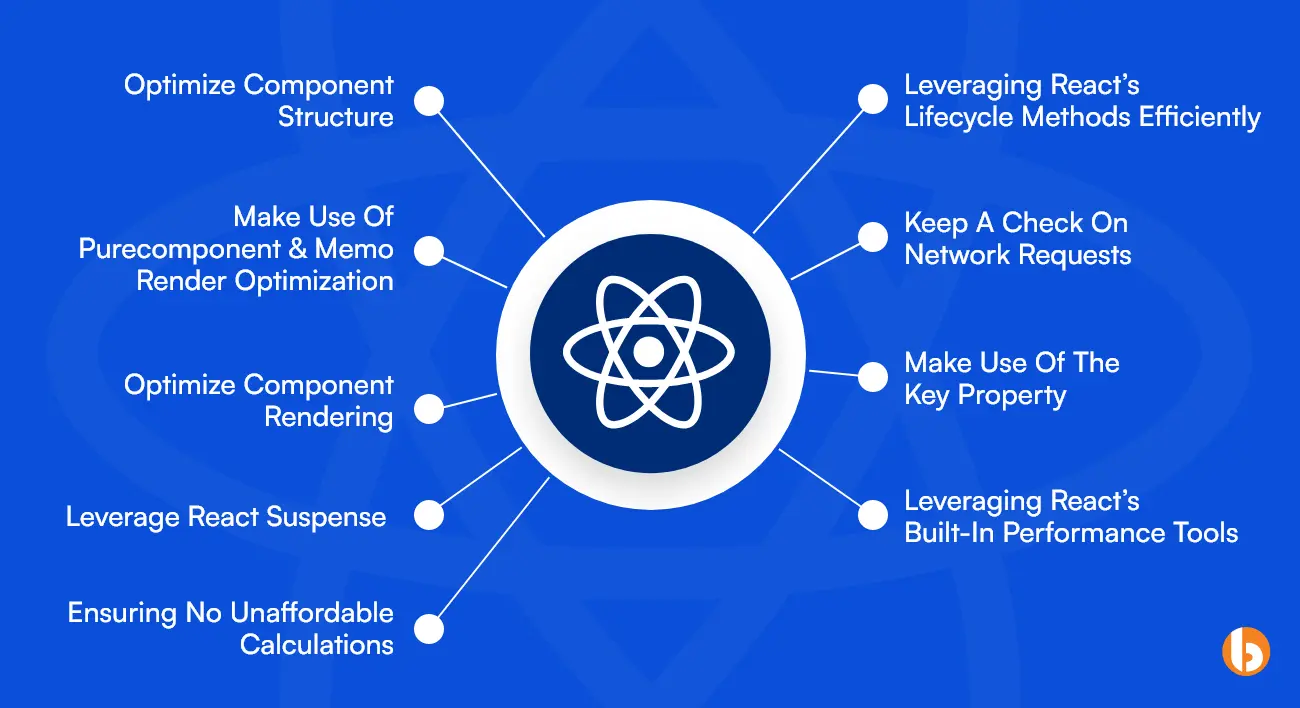
9 Best Practices for Optimizing React Rendering Performance
Now that you know how to avoid common mistakes in React rendering effectively, let’s also go through some React.js rendering best practices. These tips for optimizing React rendering performance would fasten up the app development process, save time, and ensure delivery before the deadline.

1. Optimize Component Structure
One of the best practices for optimizing React.js render performance is to reduce the number of nested components in your component structure. You can break down more significant components into smaller pieces, which helps manage them.
2. Make Use of PureComponent & Memo Render Optimization
So, when the props are the same during rendering, you must use PureComponent for class-based components and memo for functional-based components. It helps prevent re-rendering.
3. Making Sure to Optimize Component Rendering
If the components are frequently rendered or contain large amounts of information, these components may deter their performance. To overcome the performance challenge, it is advisable to use shouldComponentUpdate() to avoid unnecessary re-renders. Another method is leveraging memoization techniques like React.memo() to ensure the caching outcomes of expensive calculations.
4. Leverage React Suspense for Asynchronous Rendering
Since React is known for building enticing user interfaces, it needs optimization for additional creativity. You can even leverage React Suspense for asynchronous rendering to enhance user experience and hook your target audience to your service website or product.
5. Ensuring No Unaffordable Calculations
The second best method to improve rendering performance is to avoid executing heavy calculations or processing. Using lazy-loading techniques, you can leverage the component’s instructor to calculate or postpone measures.
6. Leveraging React’s Lifecycle Methods Efficiently
Another method to enhance rendering performance is through utilizing several lifecycle methods. One is componentWillUnmount() for cleaning up any resources or event listeners created during the component’s lifecycle. Another is componentDidMount(), used for loading data asynchronously upon the initial render.
7. Making Sure to Keep A Check On Network Requests
Another few factors that deter rendering performance are images, videos, or other assets. The solution to such problems is compressing or resizing the support, or you can even defer the loading time until it is required.
8. Make Use of The Key Property for Rendering A Dynamic List
The items in the dynamic rendering list must be changed or re-rendered; for that purpose, you must leverage the key property.
9. Leveraging React’s Built-In Performance Tools
Last, you can leverage React’s performance tools like Profiler APIs or Performance to evaluate and rectify the rendering issue. Failing to leverage these React tools would make you suffer through rendering challenges.
Conclusion
React is a Javascript library built to create intuitive user interfaces for websites or mobile apps. All thanks to declarative programming and component-based architecture that helps React programmers develop responsive apps. Another major helping hand for React developers is different React rendering types that support and boost the rendering process.
And remember the common mistakes that might happen during the rendering process. These mistakes would lag your rendering performance, but don’t worry; we have got you back. Along with methods to improve, our Reactjs rendering best practices would save you from the hassle.
If you want your website or mobile application to be perfect and rendered efficiently, connect with our software development company to get the best React js development services including the cutting-edge approach of building React apps with server-side rendering, resulting in unparalleled performance and user experience.
Frequently Asked Questions (FAQs)
The conditional rendering displays different contents based on the pre-set conditions or states. This rendering format allows the creation of dynamic user interfaces that are compatible with different user interfaces.
Conditional formatting is necessary for several reasons:
1. Enhancing user experience
2. Enhancing performance
3. Simplifying coding process
4. Building flexible and personalized components
Here are seven best amazing tools and libraries for React js render process:
1. Jest
2. Next.js
3. React Router
4. Enzyme
5. Axios
6. Redux
7. React Native
Your Success Is Guaranteed !
We accelerate the release of digital product and guaranteed their success
We Use Slack, Jira & GitHub for Accurate Deployment and Effective Communication.


