Quick Summary:
This comprehensive tutorial will explore how to implement form validations in React, leveraging React hooks and the third-party library React Hook Form. We will simplify the procedure of building form validation in React and the benefits of user input.
Table of Contents
Introduction
In today’s digital world, the demand for online marketplaces is booming. Many businesses are transitioning their operations online to meet this demand. Consequently, most websites and applications now incorporate forms. Implementing form validation is crucial for ensuring a smooth user experience and error-free data input.
This validation process verifies that user inputs meet the required criteria. With the integration of React hooks, form validation in React has become significantly more efficient. This tutorial aims to assist you in creating error-free inputs and user-friendly forms using React hooks. We’ll employ the React Hook Form library for validation purposes.
Understanding Form Validation in React
Form validation is a process that involves verifying user inputs to ensure they meet specified criteria. By employing form validation, users can be prevented from entering incorrect or incomplete data. This tutorial helps you create error-free inputs using React hooks, which ensure the development of a user-friendly form with appropriate validations.
How to Build Form Validation in React?
In this tutorial, we will develop a form that enables users to input data. Following are the steps to create form validation in React. First, we will set up our components using the Create React App to kick-start our project. This tool enables us to start a new project by executing the below commands:

Setting up the form
There are two essential components to create a form: Form.js and style.css. Form.js will handle form functionality and validation, and Style.css will define the visual styling of our webpage.
Below is the stylesheet for directly integrating it into your Form.js component for CSS specifics.
Form.js

import React from "react";
 import "./styles.css";


 function Form() {
   return (
     <div className="container">
       <h1>Contact Form</h1>
       <form>
         <div className="form-group">
           <label htmlFor="name">Name:</label>
           <input type="text" id="name" name="name" />
         </div>
         <div className="form-group">
           <label htmlFor="email">Email:</label>
           <input type="email" id="email" name="email" />
         </div>
         <button type="submit">Submit</button>
       </form>
     </div>
   );
 }


 export default Form;
Styles.css

.container {
 max-width: 400px;
 margin: 0 auto;
 padding: 20px;
 border: 1px solid #ccc;
 border-radius: 5px;
}
.form-group {
 margin-bottom: 15px;
}
label {
 display: block;
 margin-bottom: 5px;
}
input[type="text"],
input[type="email"],
textarea {
 width: 100%;
 padding: 10px;
 border: 1px solid #ccc;
 border-radius: 5px;
}
button {
 padding: 10px 20px;
 background-color: #007bff;
 color: #fff;
 border: none;
 border-radius: 5px;
 cursor: pointer;
}
button:hover {
 background-color: #0056b3;
}
.error {
 display: block;
 color: #dc3545;
 font-size: 14px;
 margin-top: 5px;
}
.error::before {
 content: "\26A0"; /* Warning symbol */
 margin-right: 5px;
}
Hire Reactjs developers to Craft Dynamic User Interfaces that Enhance Your Online Presence Efficiently
Implementing Form Validation Using React Hooks
With our Form now styled appropriately, we can integrate validation into the form. There are different styles to implement form validation using React Hooks. Let us simplify the process to implement form validation in React with the following steps:
🟠 State Management

const [formData, setFormData] = useState({
   name: "",
   email: "",
 });
 const [errors, setErrors] = useState({});
✔ formData: Within the formData state, two keys exist: ‘name’ and ’email’, initially configured as an object with blank ‘name’ and ’email’ fields. As the user inputs information, these values are stored within their corresponding keys in the formData state.
✔ Errors: Responsible for handling validation errors, initially set as an empty object.


const handleChange = (e) => {
   const { name, value } = e.target;
   setFormData((prevState) => ({
     ...prevState,
     [name]: value,
   }));
 };


 const handleSubmit = (e) => {

   e.preventDefault();
   const validationErrors = validateForm(formData);
   if (Object.keys(validationErrors).length === 0) {
     // Form submission logic here
     console.log(formData);
   } else {
     setErrors(validationErrors);
   }
 };
🟠 Event Handlers
✔ handleChange: Manages changes in input fields and updates the name and email states accordingly.
✔ handleSubmit: Triggers form submission and validation.
🟠 Form Validation
✔ validateForm: Validates the form, checking if the ‘name’ field is empty and if the ’email’ field is either empty or in a valid email format. It returns an object containing any validation errors found.
✔ isValidEmail: Performs basic email validation using a regular expression.

const validateForm = (data) => {
   let errors = {};
   if (!data.name) {
     errors.name = "Name is required";
   }
   if (!data.email.trim()) {
     errors.email = "Email is required";
   } else if (!isValidEmail(data.email)) {
     errors.email = "Invalid email format";
   }
   return errors;
 };


 const isValidEmail = (email) => {
   // Basic email validation
   return /^[^\s@]+@[^\s@]+\.[^\s@]+$/.test(email);
 };
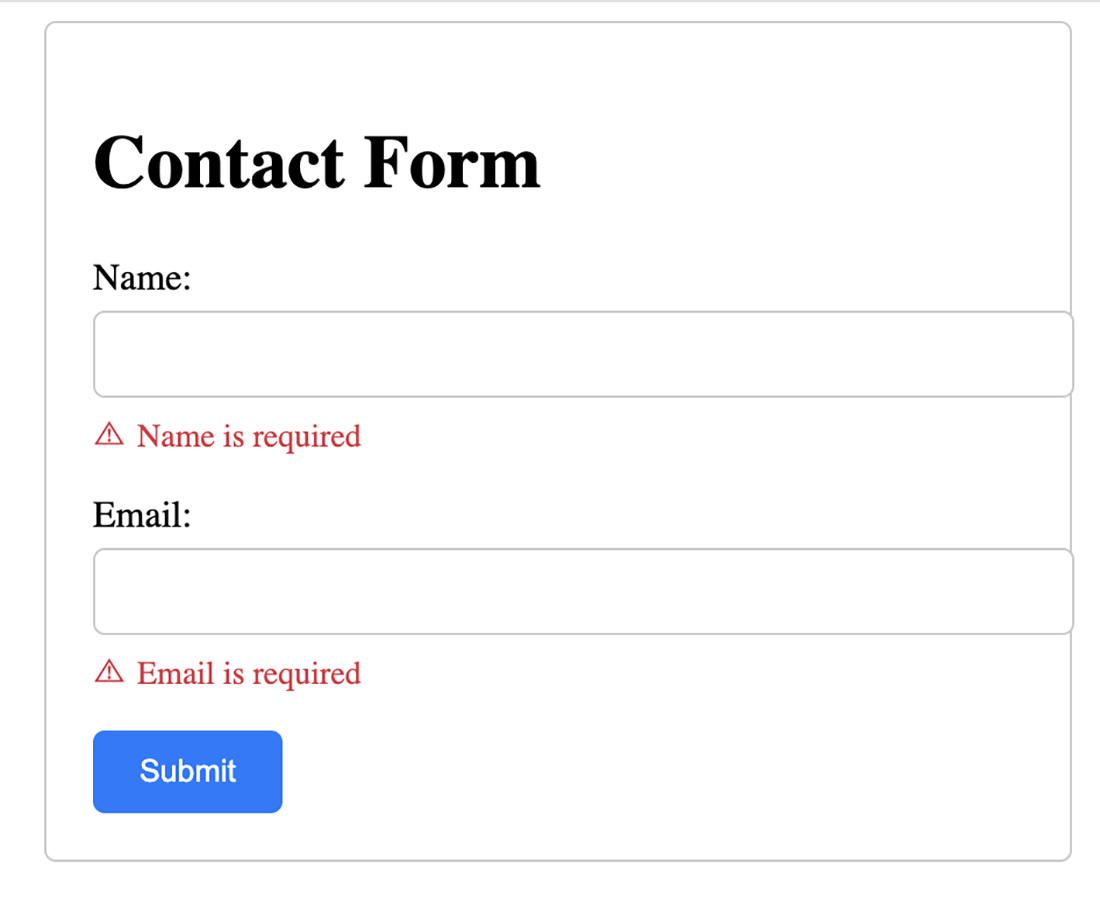
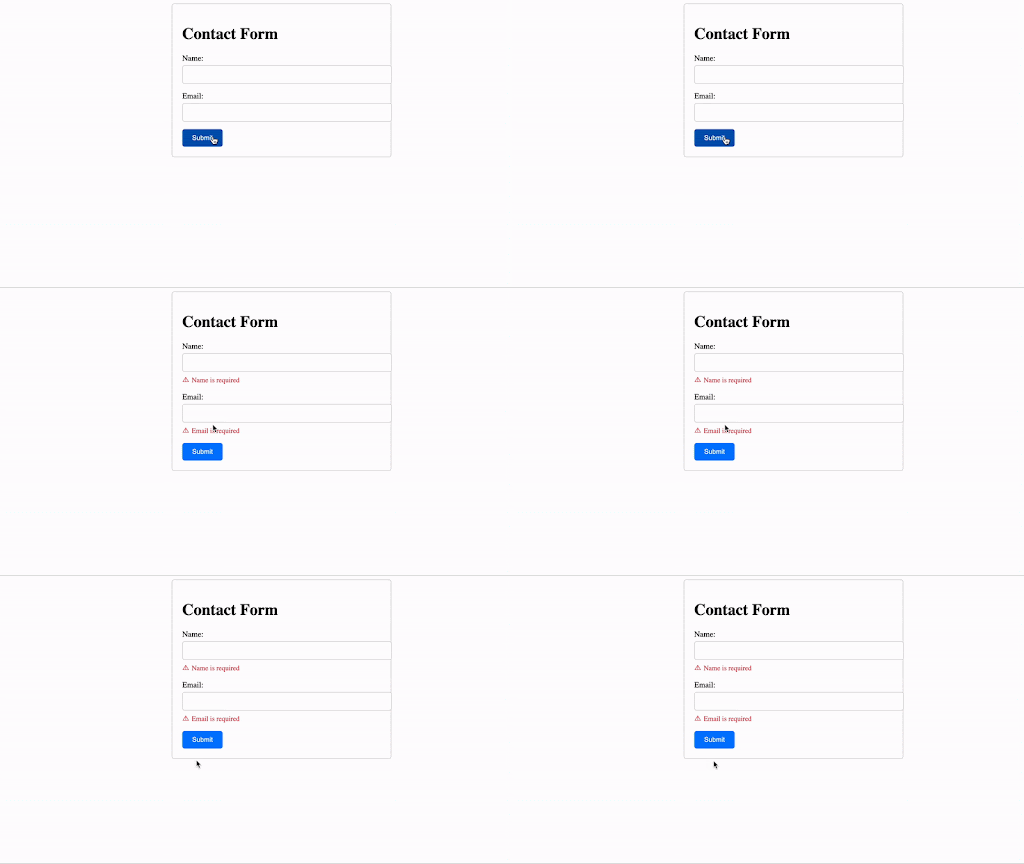
If the user attempts to submit the form without filling in the required fields, this validation function will display error messages such as “Name is required” and “Email is required”.

Below is the complete code provided regarding form validation using React hooks.

import React, { useState } from "react";
 import "./styles.css";


 function Form() {
  const [formData, setFormData] = useState({
    name: "",
    email: "",
  });

  const [errors, setErrors] = useState({});

  const handleChange = (e) => {
    const { name, value } = e.target;
    setFormData((prevState) => ({
      ...prevState,
      [name]: value,
    }));
  };

  const handleSubmit = (e) => {
    e.preventDefault();
    const validationErrors = validateForm(formData);
    if (Object.keys(validationErrors).length === 0) {
      // Form submission logic here
      console.log(formData);
    } else {
      setErrors(validationErrors);
    }
  };


  const validateForm = (data) => {
    let errors = {};
    if (!data.name) {
      errors.name = "Name is required";
    }
    if (!data.email.trim()) {
      errors.email = "Email is required";
    } else if (!isValidEmail(data.email)) {
      errors.email = "Invalid email format";
    }
    return errors;
  };


  const isValidEmail = (email) => {
    // Basic email validation
    return /^[^\s@]+@[^\s@]+\.[^\s@]+$/.test(email);
  };


  return (
    <div className="container">
      <h1>Contact Form</h1>
      <form onSubmit={handleSubmit}>
        <div className="form-group">
          <label htmlFor="name">Name:</label>
          <input
            type="text"
            id="name"
            name="name"
            value={formData.name}
            onChange={handleChange}
          />
          {errors.name && <span className="error">{errors.name}</span>}
        </div>
        <div className="form-group">
          <label htmlFor="email">Email:</label>
          <input
            type="email"
            id="email"
            name="email"
            value={formData.email}
            onChange={handleChange}
          />
          {errors.email && <span className="error">{errors.email}</span>}
        </div>
        <button type="submit">Submit</button>
      </form>
    </div>
  );
 }


 export default Form;
Implementing Form Validation using React Hook Form Library
Let’s delve deep into the steps for incorporating form validation using the React Hook Form library. We have explained everything you should know about form validation in the React Hook Form library, including installation, usage, and adding validation to the form.
How to Install React Hook Form
A comprehensive explanation of this library is available in the NPM packages documentation. You can refer to this link for further information and details.
Usage of React Hook Form
1. Import and destructure: Import the useForm hook and destructure the needed properties:

 import { useForm } from 'react-hook-form';


 const { register, handleSubmit, formState: { errors } } = useForm();
2. Register form fields: Use the register function to register each form field. Provide a key (name) and optional validation rules:

<label htmlFor="name">Name:</label>
 <input
     type="text"
     id="name"
     {...register('name', { required: true })}
 />

 <label htmlFor="email">Email:</label>
 <input
     type="email"
     id="email"
     {...register('email', { required: true, pattern: /^\S+@\S+$/i })}
 />
3. Create onSubmit handler: Define a function to handle form submission, receiving the form data as an argument:
4. Wrap form in handleSubmit: Wrap your form component with handleSubmit, passing the onSubmit function:
Here is the complete code provided for your reference, featuring the two fields that have been registered so far.

import React from "react"; import { useForm } from 'react-hook-form'; import './styles.css'; function Form() { const { register, handleSubmit, formState: { errors } } = useForm(); const onSubmit = (data) => { // Handle form submission logic here console.log('FormData', data); }; return ( <div className="container"> <h1>Contact Form</h1> <form onSubmit={handleSubmit(onSubmit)}> <div className="form-group"> <label htmlFor="name">Name:</label> <input type="text" id="name" {...register('name')} /> </div> <div className="form-group"> <label htmlFor="email">Email:</label> <input type="email" id="email" {...register('email')} /> </div> <button type="submit">Submit</button> </form> </div> ); } export default Form;
Adding Validations to Form
Here is the final step to validate our form. Let’s start with the first field name. We will use the required property.
1. Required field: Use the required property in the register to mark a field as mandatory. If the user submits the form with the name field empty, an error message will be triggered, which should be displayed below the input tag:

<label htmlFor="name">Name:</label> <input type="text" id="name" {...register('name', { required: true })} />
Here is an error message that you will get after following the above-mentioned code-

2. Email validation: Use the pattern property with a regular expression to validate the email fxormat:

<label htmlFor="email">Email:</label> <input type="email" id="email" {...register('email', { required: true, pattern:/^\S+@\S+\.\S+$/})} />
3. Displaying error messages: Conditionally render error messages based on the errors object from formState:

{errors.email && errors.email.type === 'required' && (
Email is required
)}
{errors.email && errors.email.type === 'pattern' && (
Invalid email format
)}
Following is the complete code provided for your understanding regarding form validation using the React Hook form:

import React from 'react';
import { useForm } from 'react-hook-form';
import './styles.css';
function Form() {
const { register, handleSubmit, formState: { errors } } = useForm();
 const onSubmit = (data) => {
  // Handle form submission logic here
    console.log('FormData', data);
  };
return (
<div className="container">
<h1>Contact Form</h1>
<form onSubmit={handleSubmit(onSubmit)}>
<div className="form-group">
<label htmlFor="name">Name:</label>
 <input
    type="text"
    id="name"
    {...register('name', { required: true })}
 />
{errors.name && <span className="error">Name is required</span>}
</div>
<div className="form-group">
<label htmlFor="email">Email:</label>
 <input
     type="email"
     id="email"
     {...register('email', { required: true, pattern:/^\S+@\S+\.\S+$/})}
 />
{errors.email && errors.email.type === 'required' && (
<span className="error">Email is required</span>
)}
{errors.email && errors.email.type === 'pattern' && (
<span className="error">Invalid email format</span>
)}
</div>
<button type="submit">Submit</button>
</form>
</div>
);
}
export default Form;

Conclusion
In this comprehensive tutorial, we have discussed the details of form validation in React, utilizing both React hooks and the React Hook Form library. Understanding the importance of form validation in creating user-friendly interfaces and building a basic form structure using React.
Form library and demonstrate React Hook usage for form validation, installation, registration of form fields, submission handling, and error display. As a result, implementing robust form validation mechanisms in your React applications enhances user experience and data integrity. To learn more about form validation, you can contact a React JS development company for assistance or expertise.
Frequently Asked Questions (FAQs)
React Hook Form simplifies form validation by providing built-in features like automatic error handling, validation rules, and cleaner syntax compared to manual validation with React Hooks.
- Display error messages clearly and concisely next to the corresponding field.
- Use clear and actionable language to explain the error (e.g., “This field is required” instead of “Invalid input”).
- Employ visual cues like changing the input field’s border color or displaying an error icon to draw attention to the error.
Yes, React Hook Form allows you to define custom validation functions using the resolver prop with the register function. This enables you to implement complex validation logic specific to your needs.
- Yup, a popular third-party library providing schema-based validation for complex forms.
- Another third-party library is Formik, which offers form management and validation functionalities.
- Also, React libraries like React Hook Form are generally preferred over manual validation with React Hooks due to their ease of use, built-in features, and better maintainability.
- Always perform server-side validation in addition to client-side validation. It ensures that even if a user bypasses client-side validation, the server can verify the data before processing it.
- Sanitize user input: This involves removing any potentially harmful characters or code that could be injected into the form data.
Your Success Is Guaranteed !
We accelerate the release of digital product and guaranteed their success
We Use Slack, Jira & GitHub for Accurate Deployment and Effective Communication.


