Summary
Windows Subsystem for Linux (WSL) is a feature that enables Windows users to enjoy the benefits of Linux without leaving their Windows environment. It’s a powerful tool for developers, sysadmins, and anyone who needs to work with both Windows and Linux software on the same machine.
What is Windows Subsystem for Linux?
WSL, or Windows Subsystem for Linux, is a compatibility layer developed by Microsoft that allows you to run a Linux distribution alongside your Windows operating system. It enables you to use Linux tools, utilities, and command-line interfaces on a Windows machine without the need for dual-booting or virtualization.
Here are some key points about WSL:
Interoperability: WSL bridges the gap between Windows and Linux, allowing you to run Linux software and execute Linux commands directly from the Windows Command Prompt or PowerShell.
Multiple Linux Distributions: WSL supports multiple Linux distributions, such as Ubuntu, Debian, Fedora, and more. You can choose and install your preferred distribution from the Microsoft Store.
Command-Line Integration: With WSL, you can seamlessly switch between Windows and Linux commands. It enables you to access Windows files from the Linux environment and vice versa.
Development Environment: WSL is particularly useful for developers who need a Linux-like environment for web development, scripting, and other programming tasks. You can run popular development tools like Git, Python, Node.js, and Docker within WSL.
Configure WSL step-by-step guide?
To configure Windows Subsystem for Linux (WSL), you must set up your environment for seamless integration between Windows and Linux, allowing you to work efficiently within the Linux subsystem. Below is a step-by-step guide that will help you configure WSL:
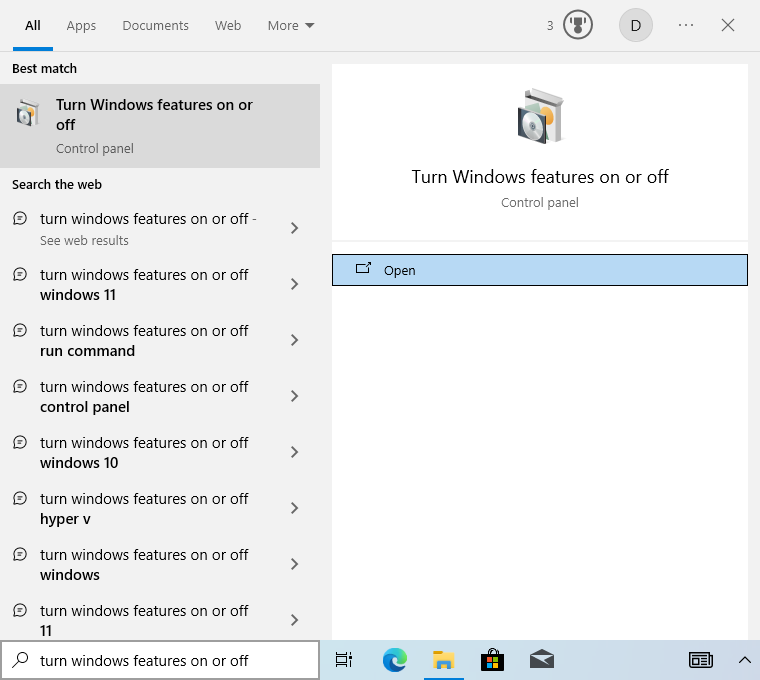
Step 1: Open the Control Panel and search for “Turn Windows features on or off.”
snapshot:
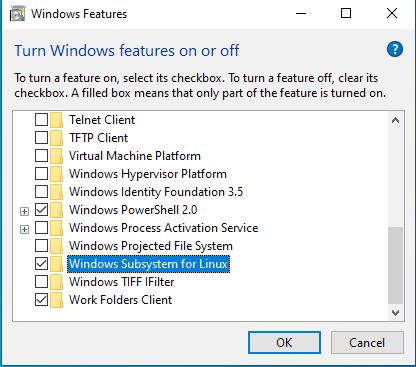
Step 2: Double-click on it and search for “Windows Subsystem for Linux,” then enable this option by clicking the checkbox.
Snapshot:
Step 3: Now, open the Microsoft Store.
Snapshot:

Step 4: Search for “Ubuntu” on the Microsoft Store.
Snapshot:
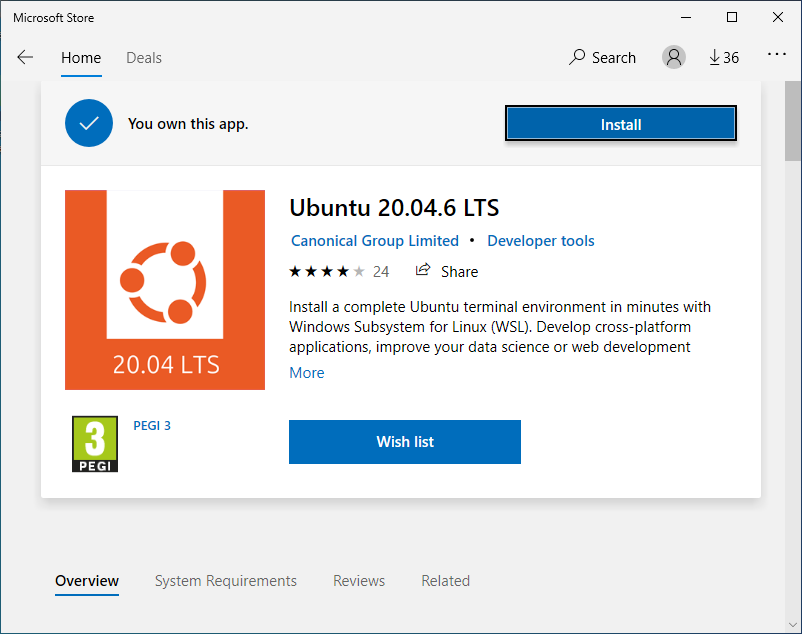
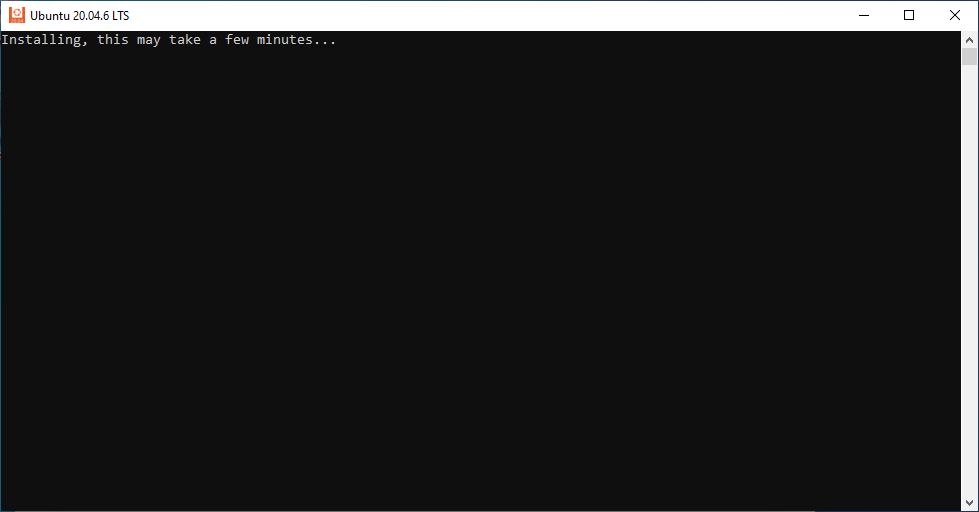
Step 5: Click on the “Install” option for the Ubuntu version that suits your needs and wait for some time. Once the installation is complete, proceed.
Snapshot:
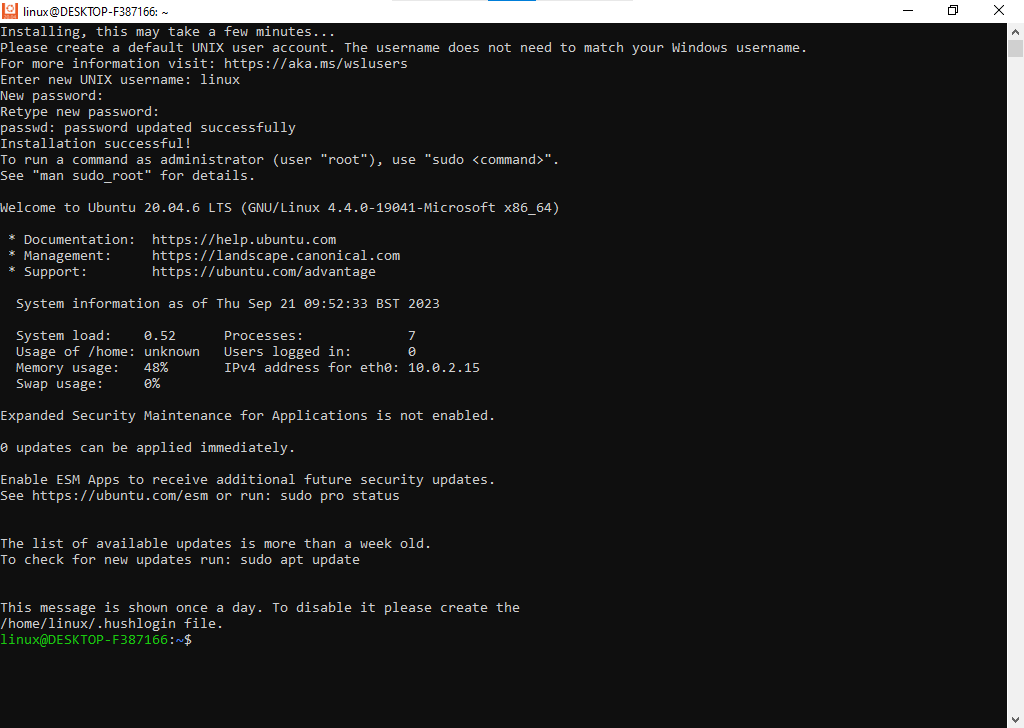
Step 6: Open the Ubuntu Terminal from the search and provide basic information, including your UNIX username and password, then click “Done.”
Snapshot:
How to Setup ruby ,rvm and rails on WSL?
Once you done with above steps just, To install RVM (Ruby Version Manager), Ruby, and Rails on Windows Subsystem for Linux (WSL), you can follow these step-by-step instructions. Please make sure you have WSL installed and a Linux distribution (e.g., Ubuntu) set up on your system before proceeding. Here are the steps:
Step 1: Update Your System
Open your WSL terminal and ensure that your system is up to date by running the following commands:
sudo apt update
sudo apt upgrade
Step 2: Install Dependencies
You’ll need some dependencies to build Ruby and Rails. Install them by running:
sudo apt install curl gpg gcc g++ make libssl-dev libreadline-dev zlib1g-dev libsqlite3-dev sqlite3 libxml2-dev libcurl4-openssl-dev libffi-dev libgdbm-dev libncurses5-dev libtool libyaml-dev libxslt1-dev autoconf bison libyaml-dev libffi-dev libgmp-dev
Step 3: Install RVM
RVM is a Ruby version manager. You can install it using the following command:
\curl -sSL https://get.rvm.io | bash -s stable
After the installation is complete, you’ll need to either restart your terminal or run the following command to load RVM:
source ~/.rvm/scripts/rvm
Step 4: Install Ruby
You can install a specific version of Ruby using RVM. For example, to install Ruby 2.7, run:
rvm install 2.7
After the installation is complete, set Ruby 2.7 as the default:
rvm use 2.7 –default
Step 5: Install Rails
You can install Rails using the RubyGems package manager, which comes with Ruby. Run the following command to install Rails:
gem install rails
Step 6: Verify Your Installation
To verify that Ruby and Rails have ruby -v rails -vbeen installed correctly, you can check their versions:
ruby -v
rails -v
You should see the Ruby and Rails versions you installed displayed in the terminal.
That’s it! You’ve successfully installed RVM, Ruby, and Rails on your WSL system. You can now start developing Ruby on Rails applications.
Need Help With Ruby On Rails Development?
Work with our skilled Ruby on Rails developers to accelerate your project and boost its performance.
Hire Ruby on Rails Developer