Quick Summary:
React Native for mobile application development has been a classic choice amongst product owners worldwide. However, no matter the evolution of the application, accessibility and efficiency Internet has become crucial for almost every mobile app. Thus, the need to consider the customer’s perspective that experiences a lack of internet connection or is devoid of internet access arises. This is the reason why offline support on React Native is gaining popularity among business and product owners. In this blog post, we have consolidated everything you need to know about React Native offline support and other aspects, such as benefits and how you can achieve it, along with add-on libraries that will help you achieve it and some tips for offline React Native support.
Table of Contents
Introduction
Mobile devices have become an integral part of our daily life; we now depend on these mobile applications more than ever. If we talk about a decade back then, mobile applications were on their way to establishing their dependency on the life of human beings. Still, most of them were limited in their usage due to the limited accessibility of the internet. However, this accessibility went on further, and now most applications require an active internet connection, but many also present limited access to several functionalities. React Native offline support plays a significant role in offering this offline functionality to most mobile applications and has now become one of the most viable options for product owners worldwide. Let us see how and why.
What is React Native Offline First?
Offline-first refers to building React native applications that offer uninterrupted functioning without internet connection access. However, now arises the million-dollar question of why we need React Native offline support when most mobile users have internet access.
Well! The answer is simple What if not? Meaning the scenarios where the internet connection is unavailable or limited. Also, often when internet connectivity is limited, the users realize the disconnect from the mobile application in terms of the internet and the user-friendliness of their user experience. There, offline-first comes as the solution to this restricted functionality. However, the add-on benefit to the offline-first approach is that it enables you to save data locally and faster.
Therefore, the latency will be there irrespective of the mobile connection, affecting the user experience. Saving data locally afterward, syncing that data to the services in the background, and loading indicators utilize lesser time in UI, and the users get to their next task faster. This allows the user to get the same user experience and responsive UI irrespective of their internet connection, whether 3G, 4G, 5G, or even no internet connection.
Importance of Offline-First Applications
Several reasons lead to businesses inclining more towards React Native offline-first applications. Below are a few reasons offline React Native applications are gaining traction and are valuable for business owners worldwide.
Improved UX
Even without the internet, offering the add-on experience to access the mobile application offers a seamless and reliable user experience. This also relieves the end-users from the worry of losing their progress or data in case of losing connectivity, and they can continue using the application without interruption.
Enhanced Accessibility
With the offline first React Native approach, your end-users can access your application even with limited or poor internet connectivity, which is prominent in rural or remote areas. Thereby making your application more accessible and easy to access, leading to an increased user base and ensuring that the users can access your application’s features and content with little or no limitation.
Reduced Data Costs
As the name suggests, offline-first applications mean it is implied that internet usage is limited. Users do not have to use their data plan to access the content cached on their device, which is crucial for users with a limited data plan.
Improved Performance
The offline-first approach depends on the server requests that reduce latency and deliver improved application performance. This allows for faster and more responsive UX, especially for areas with limited internet connectivity.
Improved Syncing
Offline-first applications use synchronization mechanisms concentrating on correct data updation whenever the data connection is available. This thwarts data loss or corruption and keeps user data updated.
Scale-Up Your User’s Experience with React Native Offline Support
Keep your users engaged even when they are offline with React Native Offline First Support. Hire React Native Developer from Bacancy and deliver the best-in-class User Experience to your Customers.
How Offline First Apps Work
Initially, we move ahead with the React Native offline-first apps; it is crucial to understand How offline-first applications work. So, without any delay, let us proceed:
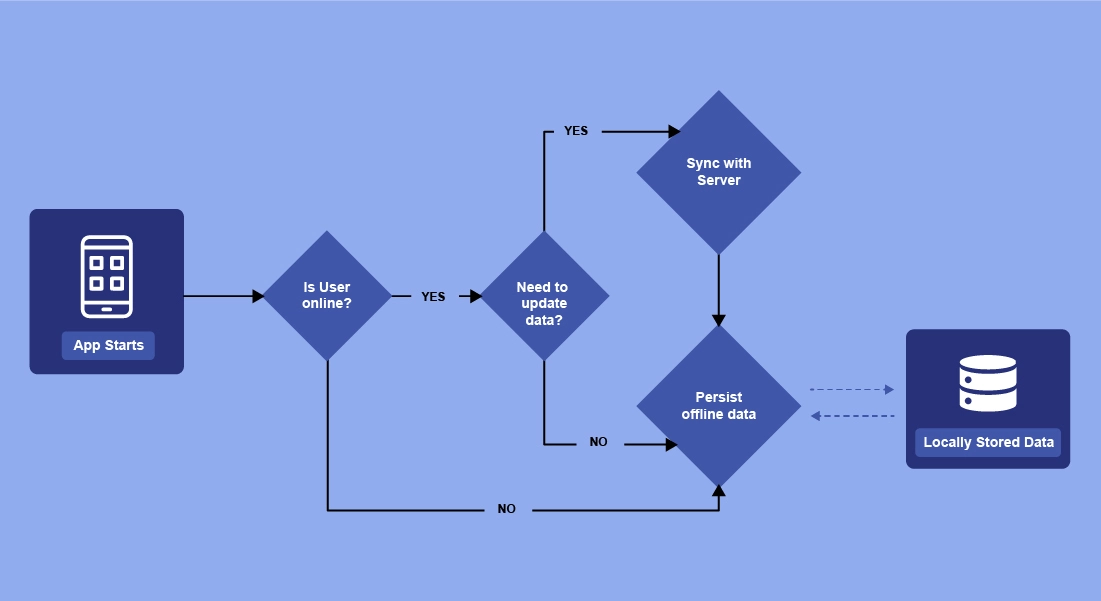
- Initially, when starting the application, the user application tests if the user has internet access
- Post verifying that the internet connectivity is unavailable, the user actions are saved within the offline database, which is not shared with the other users of the application.
- After the user gets back internet connectivity or access, the database is synchronized with the online database, which sends the information to the other application users.
To better understand the metric, let us refer to an architectural flow of the working of the offline-first applications:
Ways to Achieve Offline Support in React Native Applications
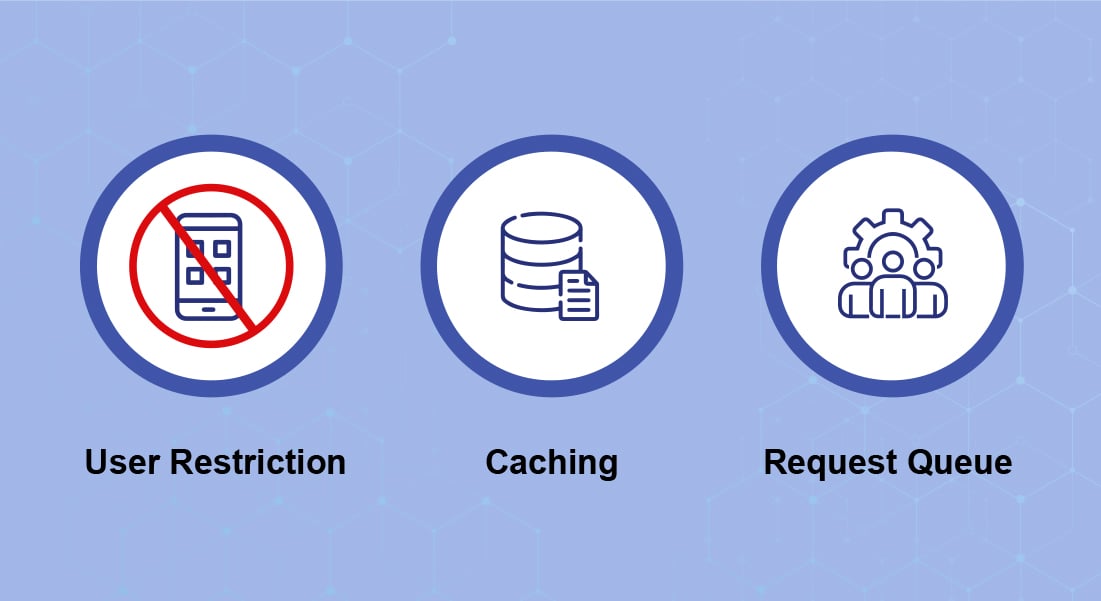
You can achieve offline React Native support in varied ways, out of which the most prominent ones are: Usage Restrictions, Caching, and Request Queues.
Usage Restriction
In this method, as the name suggests, initially, a message will be displayed to the user that states that the application is currently unable to connect with the server or does not have an active internet connection meaning a few of the features will be non-operational precisely the ones that need an active internet connection to function correctly.
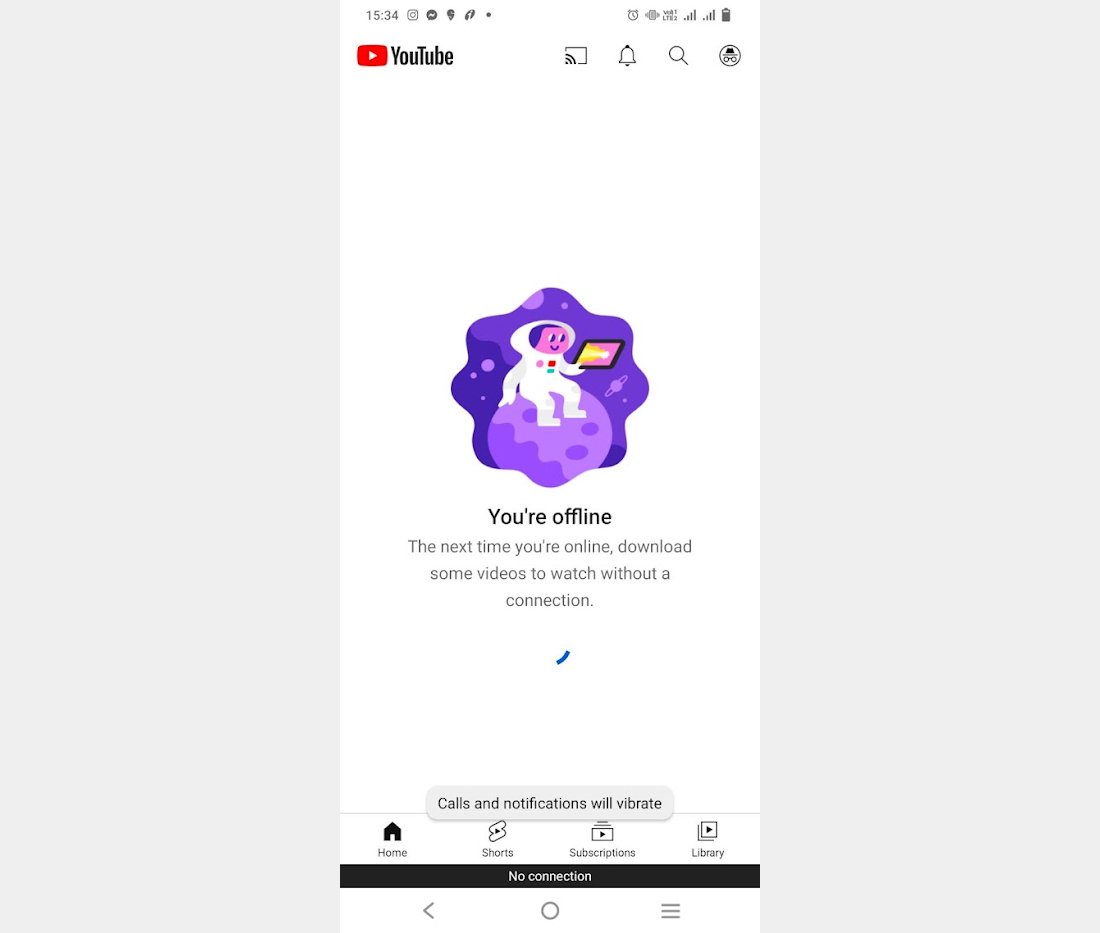
Let us see How to Implement the Usage Restrictions to your offline-first React Native application and display an offline notice when there is no internet connection. Refer to the steps below:
Step:1
Install the @react-native-community/netinfo dependency using npm:
Step:2 (iOS)
Run the below-given command in the console if you are working on iOS:
Step:2 (Android)
For Android Support, modify your android/build.gradle configuration:

buildscript {
  ext {
    buildToolsVersion = "28.0.3"
    minSdkVersion = 16
    compileSdkVersion = 28
    targetSdkVersion = 28
    supportLibVersion = "28.0.0"
  }
}
Step:3
Create the ‘OfflineNotice.js’ component in ‘app/components’:

import React from 'react';
import { View, Text, Image, StyleSheet } from 'react-native';
import { useNetInfo } from '@react-native-community/netinfo';

const OfflineNotice = () => {
  const netInfo = useNetInfo();

  if (netInfo.type !== 'unknown' && netInfo.isInternetReachable === false)
    return (
      <View style={styles.container}>
        <Image
          style={styles.image}
          source={require('../assets/images/offline.png')}
        />
        <Text style={styles.text}>No Internet Connection</Text>
      </View>
    );

  return null;
};

const styles = StyleSheet.create({
  container: {
    alignItems: 'center',
    justifyContent: 'center',
    height: '100%',
    width: '100%',
    zIndex: 1,
  },
  image: {
    height: 500,
    width: 500,
  },
  text: {
    fontSize: 25,
  },
});

export default OfflineNotice;
Step:4
Import and use the OfflineNotice component in App.js:

import React, { useState } from 'react';
import { StyleSheet, SafeAreaView } from 'react-native';

import LandingScreen from './Screens/LandingScreen';
import userApi from './api/user';
import OfflineNotice from './components/OfflineNotice';

const App = () => {
  const [users, setUsers] = useState([]);

  const getUser = async () => {
    const tempUser = await userApi.getUsers();
    setUsers([...users, tempUser]);
  };

  return (
    <>
      <OfflineNotice />

      <SafeAreaView style={styles.container}>
        <LandingScreen getUser={getUser} users={users} />
      </SafeAreaView>
    </>
  );
};

const styles = StyleSheet.create({
  container: {
    flex: 1,
  },
});

export default App;
Follow the steps above to successfully implement the Usage Restrictions to your React Native application by displaying an offline notice without internet connectivity.
Caching
In this, the application will be able to receive the response from the server and store it within the local storage of the device. This enables you to retrieve and render the data from the local storage in scenarios where the application cannot connect to the internet. The download feature offered by YouTube and similar other applications is the ideal example that illustrates the working of caching.
Caching Without Redux
To implement caching without Redux in a React Native app, follow these steps:
Step:1
Install the required dependencies by running the following command:
Step:2
Create the cache layer under app/Utility/cache.js with the following code:

import AsyncStorage from '@react-native-async-storage/async-storage';
import moment from 'moment';

const prefix = 'cache';
const expiryInMinutes = 5;

const store = async (key, value) => {
  const item = {
    value,
    timeStamp: moment().valueOf(),
  };

  try {
    await AsyncStorage.setItem(prefix + key, JSON.stringify(item));
  } catch (err) {
    console.log(err);
  }
};

const isExpired = item => {
  const now = moment(moment().valueOf());
  const storedTime = moment(item.timeStamp);
  return now.diff(storedTime, 'minutes') > expiryInMinutes;
};

const get = async key => {
  try {
    const value = await AsyncStorage.getItem(prefix + key);
    const item = JSON.parse(value);

    if (!item) return null;

    if (isExpired(item)) {
      await AsyncStorage.removeItem(prefix + key);
      return null;
    }

    return item.value;
  } catch (err) {
    console.log(err);
  }
};

export default { store, get };
Step:3
Modify the get method of your API client in app/api/client.js to handle caching:

import { create } from 'apisauce';
import cache from '../utility/cache';

const apiClient = create({
  baseURL: 'https://randomuser.me',
});

const get = apiClient.get;

apiClient.get = async (url, params, axiosConfig) => {
  const response = await get(url, params, axiosConfig);

  if (response.ok) {
    await cache.store(url, response.data); // Cache the response
    return response;
  }

  const data = await cache.get(url); // Retrieve data from cache
  return data ? { ok: true, data } : response;
};

export default apiClient;
Following these steps, as given above, will enable you to implement Caching without Redux in your React Native application. This also allows you to store and retrieve data from the local storage, ensuring that even if the application is launched offline, it can easily fetch the stored data from the cache.
Caching With Redux
You can implement Caching with Redux using the redux-persist in your React Native applications by following the steps given below:
Step:1
Install the required dependencies by running the following command:

npm install redux react-redux redux-saga redux-persist @redux-devtools/extension @react-native-async-storage/async-storage
Step:2
Update your Redux store configuration in app/store/index.js with the following code:

import { createStore, applyMiddleware } from 'redux';
import { composeWithDevTools } from '@redux-devtools/extension';
import createSagaMiddleware from 'redux-saga';
import { persistStore, persistReducer } from 'redux-persist';
import AsyncStorage from '@react-native-async-storage/async-storage';

import reducers from '../reducer';
import sagas from '../sagas';

const sagaMiddleware = createSagaMiddleware();

const persistConfig = {
  key: 'root',
  storage: AsyncStorage,
};

const persistedReducer = persistReducer(persistConfig, reducers);

export const store = createStore(
  persistedReducer,
  composeWithDevTools(applyMiddleware(sagaMiddleware))
);

sagaMiddleware.run(sagas);

export const persistor = persistStore(store);
Step:3
Wrap your app component with the PersistGate component in index.js:

import React from 'react';
import { AppRegistry } from 'react-native';
import { Provider } from 'react-redux';
import { PersistGate } from 'redux-persist/integration/react';

import App from './app/App';
import { name as appName } from './app.json';
import { store, persistor } from './app/store';

const ConnectedApp = () => {
  return (
    <Provider store={store}>
      <PersistGate persistor={persistor} loading={null}>
        <App />
      </PersistGate>
    </Provider>
  );
};

AppRegistry.registerComponent(appName, () => ConnectedApp);
Following these steps, you successfully integrated caching with Redux using redux-persist in your React Native app. The PersistGate component ensures that your Redux store is persisted and rehydrated between app launches, allowing you to cache and retrieve data seamlessly.
Request Queue
In this one, as the name suggests, the feature requests are all stored, which we can execute once the application has access to the internet or is online again. The offline edit feature of Google Docs and the note-taking app that has this feature implemented would enable the users to implement and make changes even without internet connectivity, as the changes made are backed up within the server.
To implement the Request Queuing in your React Native application using the redux-offline library, follow these steps as given below:
Step:1
Install the @redux-offline/redux-offline dependency by running the following command:
Step:2
Update your Redux store configuration in store.js with the following code:

import { applyMiddleware, createStore, compose } from 'redux';
import { offline } from '@redux-offline/redux-offline';
import offlineConfig from '@redux-offline/redux-offline/lib/defaults';

const store = createStore(
  reducer,
  compose(
    applyMiddleware(middleware),
    offline(offlineConfig)
  )
);
Step:3
Redefine your Redux actions with offline metadata. For example, if you have a setUsers action, you can update it as follows:

const setUsers = users => ({
  type: 'SET_USERS',
  payload: users,
  meta: {
    offline: {
      effect: { url: '/api/save-data', method: 'POST', json: { users } },
      commit: { type: 'SAVE_USERS_COMMIT', meta: { users } },
      rollback: { type: 'SAVE_USERS_ROLLBACK', meta: { users } }
    }
  }
});
In the above code, the meta property of the action includes offline metadata. The effect property represents the network action to save the changes; the commit property is the action to dispatch when the effect succeeds, and the rollback property is the action to dispatch if the network action fails permanently.
Using the @redux-offline/redux-offline library, network actions are queued and executed when the app goes back online. If a network action fails permanently, the corresponding rollback action is dispatched to undo the changes made in the application’s state.
Note: If you’re working on the Android platform, request permission to access the network state in your AndroidManifest.xml file:
Libraries to Build React Native Offline First Applications
Now that we know about the ways to implement React Native offline support to create offline-first applications let us refer to the libraries that can help us with offline React Native apps:
WatermelonDB
When you have a simple React native application that depends on remote services for data storage and utilizes Redix throughout the application using the packages like the react-native-offline and the redux-persist can be your go-to options. However, when you are looking for more data-intensive applications, employing these may result in performance slowdowns, whereby utilizing the Redux can lead to more loading times; both the packages require the Redux for managing the data in both online and offline scenarios.
For more complex applications that utilize the SQL database, Watermelon DB is a more effective alternative that allows for local storage and access to data in an SQLite database using a separate native thread; It also follows the lazy loading approach where data is only loaded when needed, that enables quick resolution of queries.
Although WatermelonDB primarily serves as the local database, it also presents synchronization primitives and adaptors that allow syncing of local data with a remote database. For implementing the data synchronization with WatermelonDB, you need to create two API endpoints on your backend, one for pushing the changes and the other for pulling the changes. Also, you need to develop your logic for determining when to initiate the data synchronization.
MongoDB Realm
Choosing MongoDB Realm SDK for creating a React Native application becomes simpler as it offers a seamless creation and authentication of the users across devices using various authentication methods like emails and passwords, JWT, Google, Apple, and Facebook. This SDK also allows data synchronization functionality to sync your data with a cloud-hosted MongoDB effortlessly.
Moving forward, WatermelonDB may not be the most viable option when your data-intensive applications rely on non-relational data. Instead, MongoDB presents a better alternative. Using the Realm database, a local NoSQL database, within your React Native app, you can leverage its integration capabilities with MongoDB Atlas for enhanced functionality.
Add-on Tips to Building React Native Offline First Apps
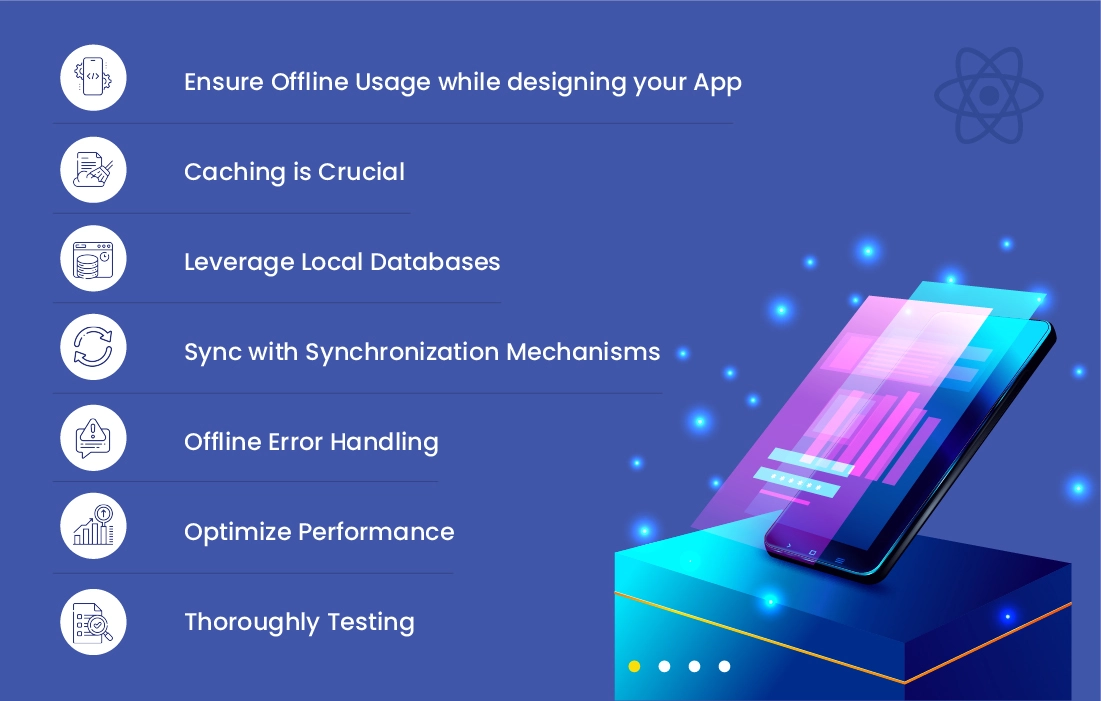
Offline React Native benefits significantly in keeping your user engaged and putting your app bounce rate at bay whenever your user uses the application without internet connectivity. However, below are a few add-on best practices to help you get the most out of your mobile app when building offline-first React Native applications:
Ensure Offline Usage While Designing Your App
When designing your offline-first-react-native application, make sure you know how your user would interact with it when they are offline. Make sure that your application can offer a seamless experience even when your mobile application is devoid of internet connectivity or the internet connectivity is unavailable.
Caching is Crucial
Caching is the best way by which you can store the data within your application’s local database in the absence of data connectivity. This practice ensures that your application is functional even when you are not having internet connectivity. You can go for caching libraries such as React Native Cache or React Native AsynStorage to make it easier to manage the cached data.
Leverage Local Databases
React Native Local databases such as SQLite, Realm, WatermelonDB, and others help you to store and manage data on the device. This enables your application to function offline and offers an option to store data that can be synced with the server when the application gets access to the internet again.
Sync with Synchronization Mechanisms
You can introduce synchronization mechanisms that update the data with the server whenever your application regains access to the internet connection. You can use techniques such as polling servers for updates, serverless architectures, or WebSockets to synchronize the data.
Offline Error-Handling
Error Handling is one of the most significant parts of your mobile application; when considering the offline-first-react-native, you can implement the error handling mechanisms for actions that cannot be completed offline, such as submitting a form, making a purchase, or making a payment. You must also provide proper feedback to the end user so they can understand the issue and take the necessary actions as soon as they regain access to the internet.
Performance Optimization
React-Native-offline-first applications can improve performance by reducing server requests and data usage. You can optimize your application’s performance by minimizing the data sent and received over the network and reducing server latency.
Thoroughly Testing
Testing is that part of your application that prevents your application from hampering the user experience. You can test your application thoroughly offline and in case of poor connectivity scenarios that help ensure that it offers a seamless experience for users within these situations.
Conclusion
Summing up this blog post on React Native Offline Support, we can infer that offline-first functionality is crucial to delivering an unmatchable user experience. If you are a business owner, you can choose any of the above-given methods to implement offline-first functionality in your React Native application. Also, make sure to take into consideration the best practices that can take your user’s experience to the next level. However, being a business owner, if you are still confused about the benefits and functionalities that you can introduce in your existing React Native application or implement the same into your next project. Consider partnering with a React Native App Development Company like Bacancy to help you gain more insight and make the right choice.
Frequently Asked Questions (FAQs)
Yes, you can implement offline features that allow the app to function partially or provide a limited set of features offline that typically involves caching data, detecting network status, and synchronizing data when the device is online again.
You can use libraries like NetInfo or react-native-NetInfo to detect the network status in a React Native app. These libraries provide methods to check whether the device is online or offline, and you can use this information to handle offline scenarios accordingly.
React Native offers AsyncStorage, a simple key-value store for persisting data locally on the device. You can use AsyncStorage to cache data fetched from an API or store relevant application data, enabling your app to display cached data when the device is offline.
When a network request fails due to offline status, you can handle the error gracefully by displaying an appropriate message to the user. You can also provide options for retrying the request once the device has an internet connection or offer alternative actions that can be performed offline.
You can synchronize data in the background when the device is offline using libraries like react-native-background-fetch or react-native-background-task. These libraries allow you to schedule background tasks that sync data with a server whenever the device has an internet connection.
You can use local databases like SQLite or Realm in a React Native app to store and manage data offline. These databases allow you to perform operations on locally stored data until a network connection is available for synchronization.
Your Success Is Guaranteed !
We accelerate the release of digital product and guaranteed their success
We Use Slack, Jira & GitHub for Accurate Deployment and Effective Communication.


