Quick Summary:
Technology surrounds us at every step of our traditional lifestyle. These technological surroundings evolve as time passes by. Every day a new technological advancement takes the industry by storm. Business owners to adapt to the technological revolution chose the microservices approach. But, the front end keeps on dangling for a boon there comes the Micro Frontend as a boon. This blog post revolves around Angular Micro Frontends and its benefits. Also, it covers the micro frontend architecture angular and its implementation. In the end, this blog intends to help you decide why choosing Micro Frontend Angular is the key to your organization’s success.
Table of Contents
What are Angular Micro Frontends?
Angular Micro Frontends refers to an architectural pattern, involving the breaking down of a large Angular web application into small, independent, and deployable micro-applications with every micro-application being responsible for handling its own set of features. It intends to club web applications from different technologies and multiple domains under a single domain as a single web application although the tech stack and the deployment server may be different i.e. Sharing a base URL. The goal behind the Micro Front Frontend Architecture Angular is to enhance scalability, flexibility, and maintainability by reducing the complexity of the web application and promoting modularity.
The Need for Angular Micro Frontends Architecture
Nowadays, every business owner wishes to consolidate a huge assortment of services and deliver everything in one place for their user’s needs which leads to an increase in the application size due to the addition of numerous functionalities, modules, and pages which makes it challenging for multiple teams of developers to work on a project as several instances may arise where more than one team would be required to work on a single, module, page, or functionality.
The need for Angular Micro Frontends becomes a mandate in this scenario because when multiple teams or developers start working on the same page they may overwrite each other’s changes or may face conflicts while committing code and delay the release process also multiple instances of re-testing are needed to ensure no faulty code is there within the application at the time of release.
For a simple solution, to avoid such scenarios, each team or developer can create their repo for their module/sub-domain and work independently without worrying about other developers’ changes, or commit changes, and whenever the module’s route gets activated, the new changes will be there on Page. Hence, all the developers can avoid the tasks of taking a regular pull from the target branch / Merge conflict and others. The Angular Miocrofrontend architecture brings various benefits for the developers and product owners such as:
- Multiple Tech Stacks can be used simultaneously
- Easy to Add/Update/Remove Code
- No code Sharing
- Single Page Applications or SPA look alike
- Easier Application Maintenance
- Improved Code Organization
- Simplified Development Process
- Efficient Debugging
- Better Team Co-ordination
- Enhanced Flexibility
Do all Angular Applications Need the Angular Micro Frontends Approach?
Many business owners wonder if all the applications need the Micro Frontend Angular approach for their web application development. Well! the answer to this question is simply NO! This approach is only recommended for instances of large and complex applications development where the modules and pages are dependent on each other and it is difficult for different teams of developers to work on the same application simultaneously. For, smaller and non-complex applications that involve a few modules/pages and are not complex, the traditional approach is the most viable solution.
How the Angular Micro frontend Architecture is different from Traditional architecture
To better understand How Microfrontend architecture is different from traditional architecture let us take a few instances:
Repository
In Traditional Architecture, the Application’s all Code/Modules/Pages/Functionality are kept/committed within a single Repository, While in Angular Micro Frontend Architecture it is not needed to keep all Code / Modules/Pages/Functionality within a same Repository.
Technology
In a Traditional Architecture, all the Code / Modules/Pages/Functionality mostly shares the same technology i.e., Angular/PHP/JAVA/C#, etc. But for Micro Frontend Architecture this is not required anymore i.e., Page 1 can be of Angular, Page 2 Code can be of C#, etc.
When the Application becomes larger, the initial loading time of the application also increases, and the ‘Waiting’ scenario does not give a good impression to the end user.
Ready to embrace the power of Angular Micro frontends?
Hire angular developers from us to create frontend applications that are faster, more scalable, and more user-friendly than ever before.
Ways to Implement the Micro Frontend Angular Architecture
There are many ways to Implement Microfrontend Architecture, below are the most common ways mentioned:
Iframe
- The iframe is used to load nested /independent web pages along with the parent webpage.
- It is an HTML element and by specifying the desired URL in the tag we can load a different webpage and implement the Microfrontend Architecture
- As Iframe has its context and sharing data with a parent or other webpage becomes more difficult and all operation needs to be done using Global context and Objects i.e ‘Window ‘object of the browser and that makes the application more vulnerable.
NGINX
- NGINX is an Open-Source web server created for modern web applications to provide high performance and easy to maintain the routing of different applications if all applications are on the Same server.
- Based on the Config provided on file for matching route and landing page, The NGINX process the request.
- As the Config file is a text file only, it’s easy to add/update and remove the mapping of route and landing page details
Third-party Libraries
Many libraries are there to implement Angular Micro Frontend Architecture, below are the some of popular libraries:
- Single-SPA
- Module-federation
- FrintJS
This library does not need to change existing code Or logic, It needs some wrapping code/config to enable Microfrontend Architecture.
Example with Single-SPA library:
Scenario 1:
- In any company, Multiple Departments exist and they all are available on the internal web application, Departments like Sales, HR, Admin, Purchase, Account, IT, etc, and based on the employee’s role, users can view/access only that particular account’s functionality from the application based on Authorization.
- All these departments need some changes to the application on daily basis i.e to add new features and maintenance etc.
- Team/developers that handle the different Department’s responsibilities add new features/bugs solved in shared code where all other departments’ code already exists.
- As it’s a shared code, regression testing is needed to make sure other departments’ functionality is not impacted and this makes the release process too slow.
- Some of the functions are common and may be used by other departments i.e trim space/ sort data / shared interface and enum, and any minor change to this may disturb the existing functionality.
The Issue with Scenario 1
- Code is Shared with all departments
- Delay in the Release process
- All department code is released through a change in only 1 department’s code
- Code dependency issues
Scenario 2:
- All above department wise Sub-domain /separate URL is created (i.e sales.mycompany.com / accounts.mycompany.com / admin.mycompany.com), So the user needs to login to the specific department application, If the user wants to use another department application, he has to re-login in other department’s URL
- All this department-wise code exists in different Repository, so individual department’s code is Independent.
- Any department’s code needs changes, Only that code needs to be tested and released.
The Issue with Scenario 2:
- All department does not share the same URL
- The user needs to login into multiple departments
How Micro Frontend Architecture will solve the above problem?
All above issues can be addressed by implementing Microfrontend Architecture, Below is the explanation:
- Microfrontend Architecture will allow us to share a common URL, So using Microfrontend Architecture the URLs look like i.e mycompany.com/sales || mycompany.com/accounts ||mycompany.com/admin(Pretty similar to other Single page applications)
- No more requirements to use the same programming language code for all departments.
- Using Local storage or NgRx, we can share Session data among all the applications, So login into multiple domains is not required.
- Whichever department’s code needs changes only those department’s codes need to be released, So fast release process.
The Step-by-Step Guide to Implementing Angular Micro Frontend Architecture
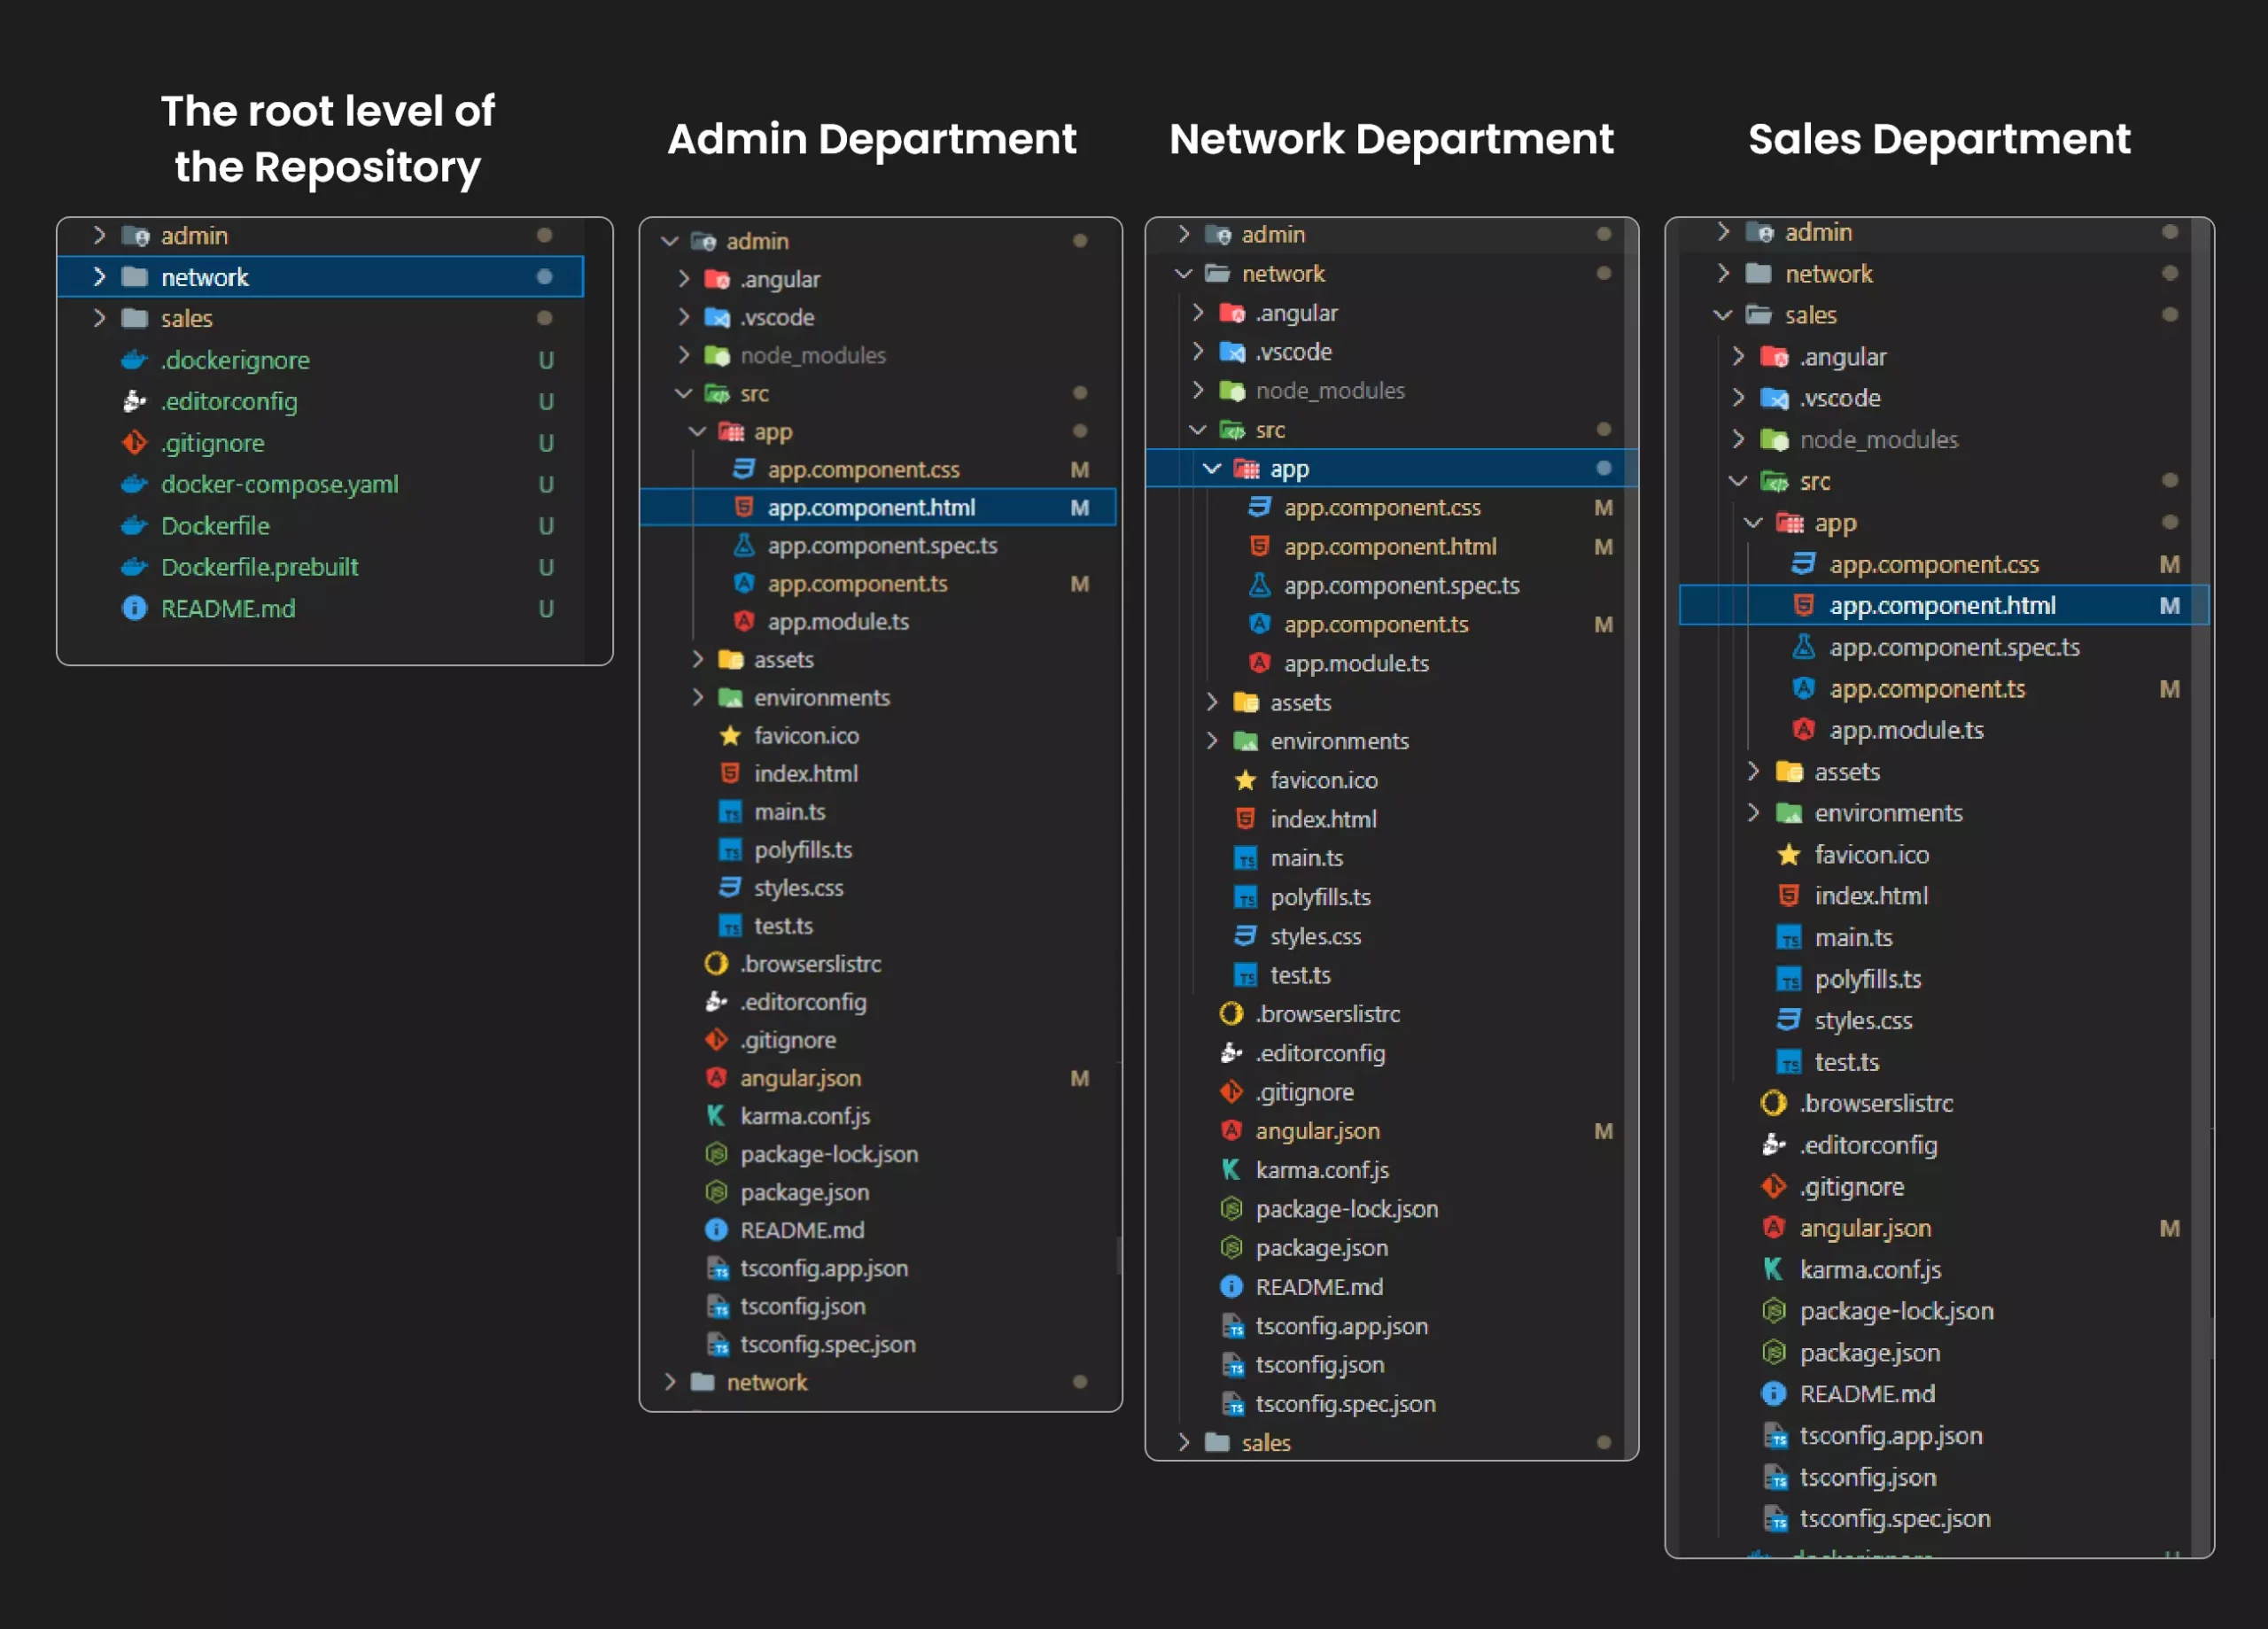
From the different ways we discussed above, we will use ‘single-spa’ the popular and easy-to-implement library. Below is the Traditional / Existing Code structure that has different department-wise codes and is released independently and accessed via different URLs i.e sales.mycompany.com / accounts.mycompany.com / admin.mycompany.com

To make an Existing application of Microfrontend Architecture, Follow the below steps:
Step 1: Create Root / Wrapper Application
First, we need to create a new wrapper/container application.
Install the Package:
Run the below Command with Options at the root of the repository level:

Here we are creating a wrapper application that will represent/wrap all different domain applications under a single Base URL, here we have used the “single-spa root config” option as the project already exists and we need to create only a wrapper.
Note: This command will install node modules as well.
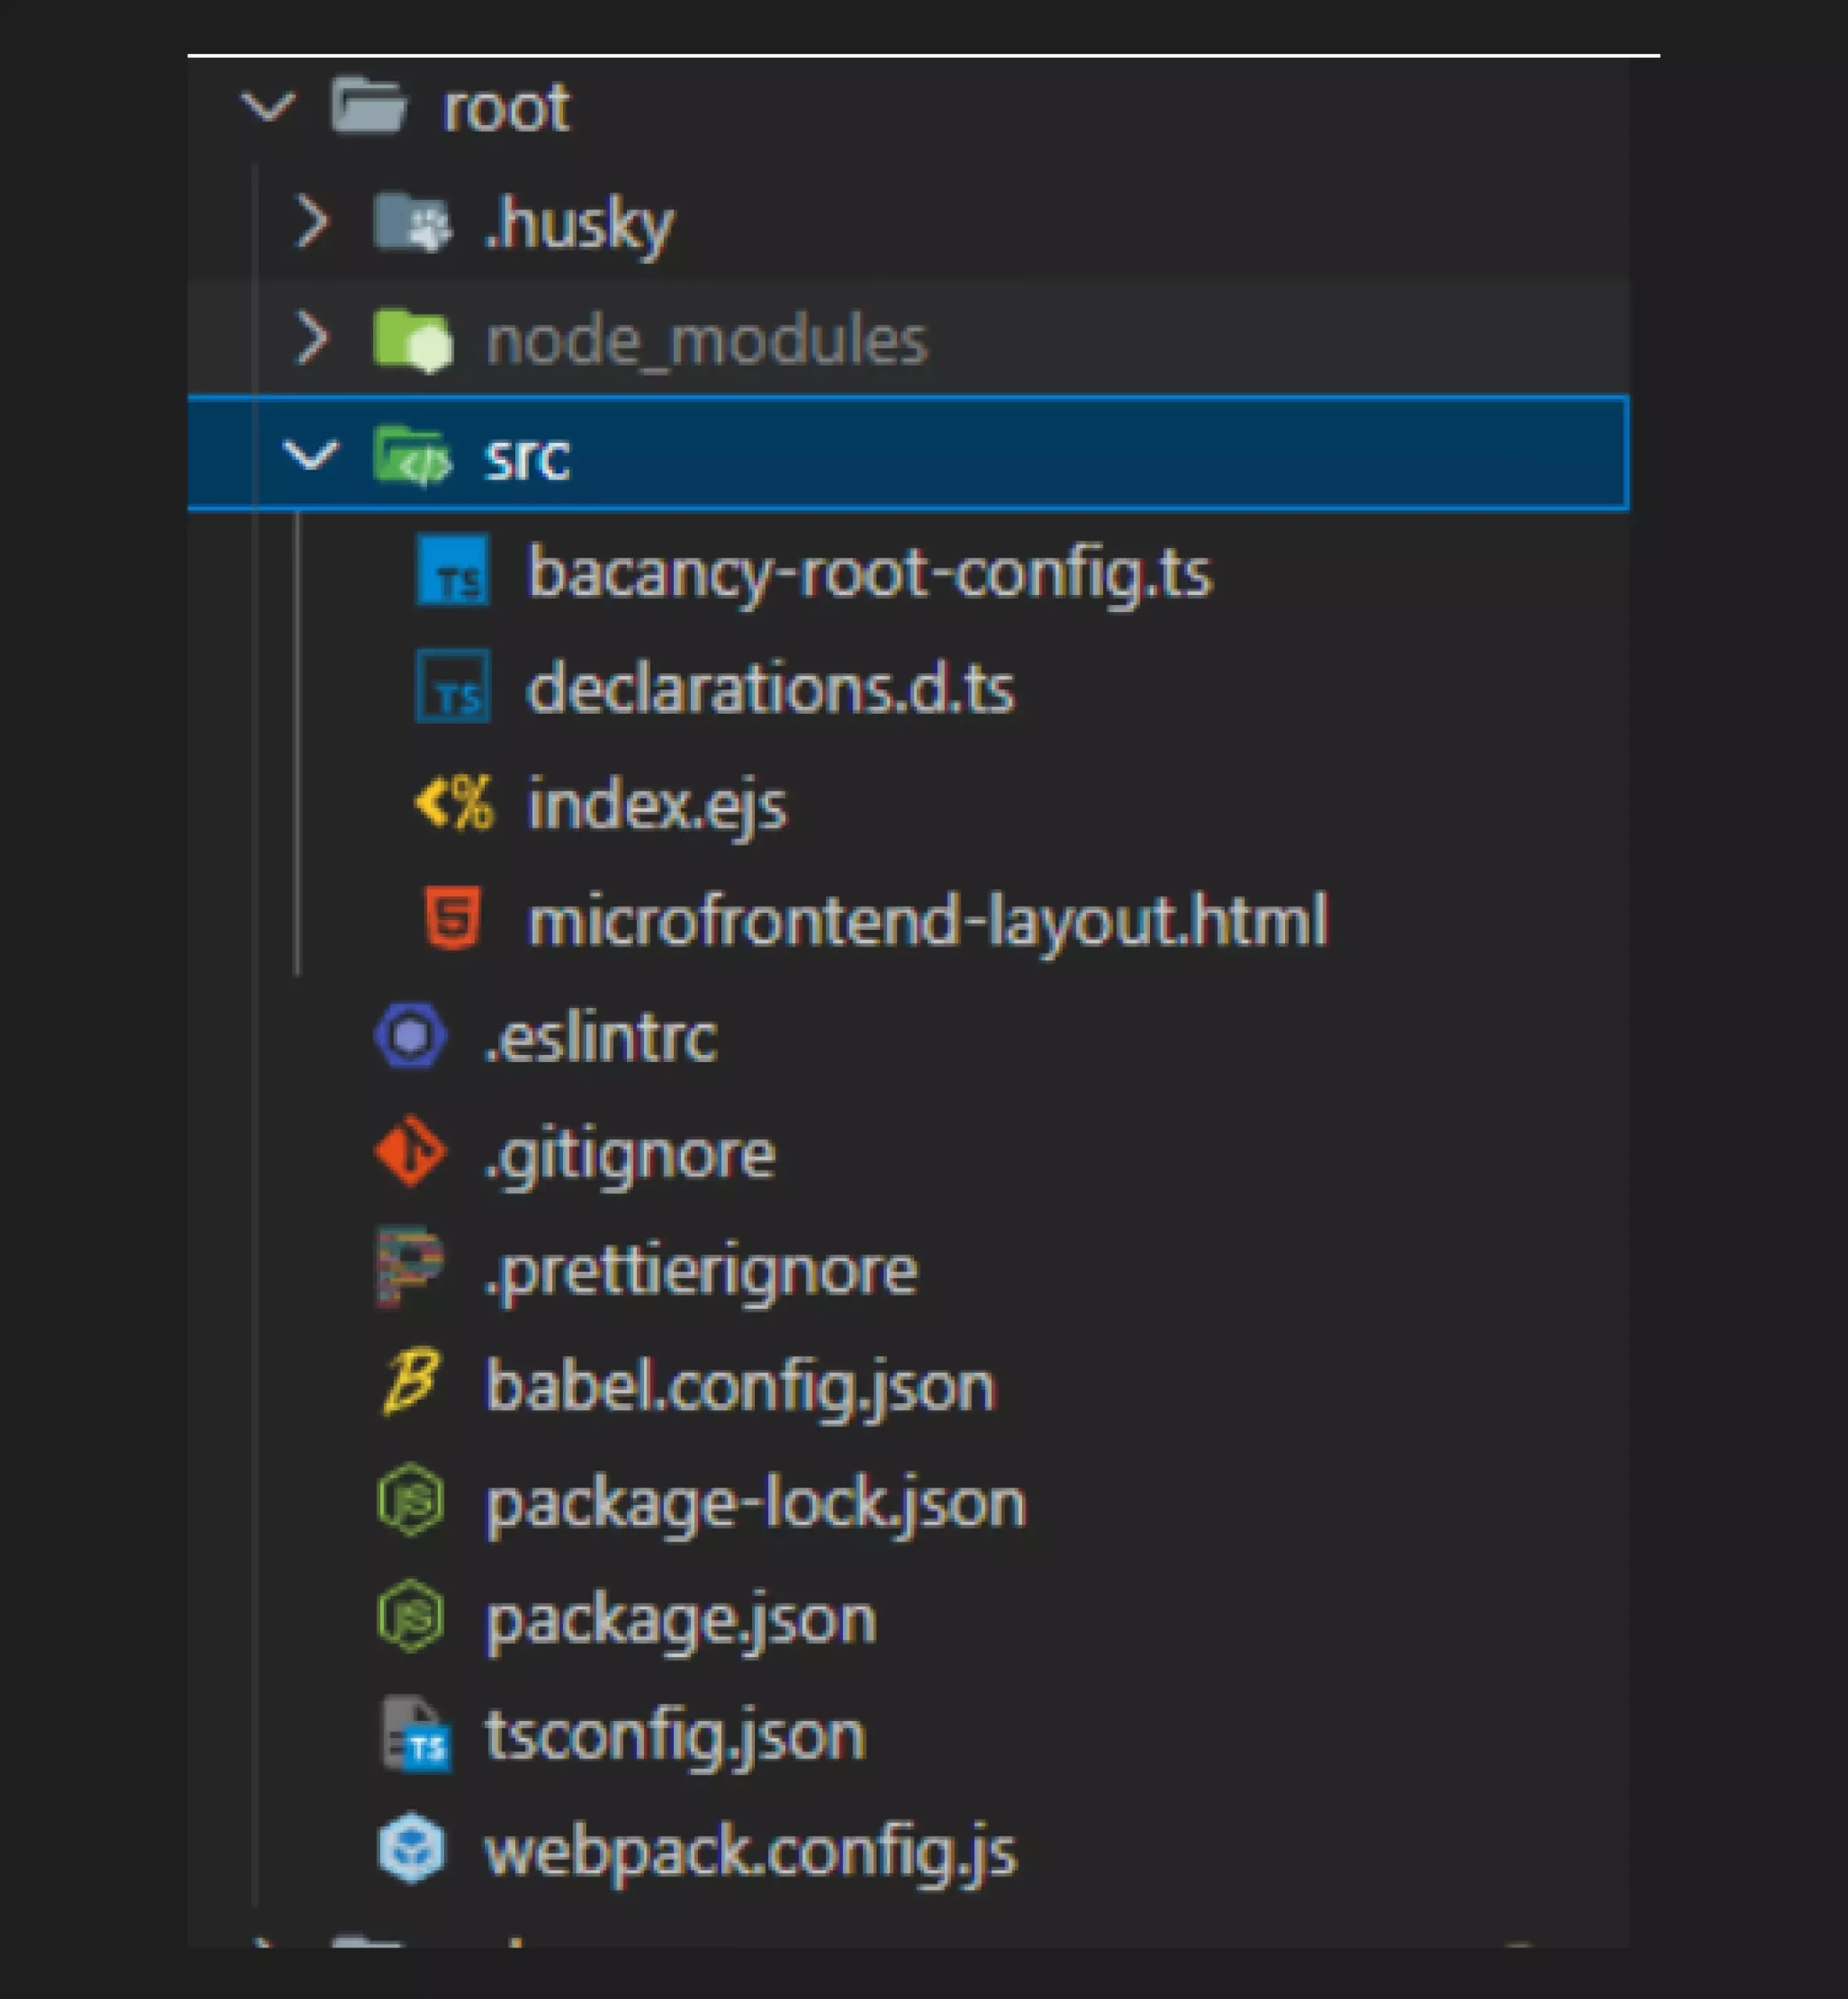
The output of the above command will be:

One “root” folder will be created with some files that look like kind of config files along with common Angular files like tsconfig,package.json, etc.
Let’s understand Each file in brief:
bacancy-root-config.ts
- All the desired applications must be registered here along with their path (same as router config file of Angular module)
- The “index.ejs“ file loads this config file.

<% if (islocal)  ( %)
 <script type="systemjs importmap">
   {
"imports": {
"@single-spa/welcome": "https://unpkg.com/single-spa-welcome/dist/single-spa-welcome.js",
"@bacancy/root-config": "//localhost:9000/bacancy-root-config.js"
      }
    }
  </script>
<% } %>

<body>
   <noscript>
     You need to enable Javascript to run this app.
   </noscript>
  <script>
     System. import (*@bacancy/root-config’);
   </script>
 <import-map-overrides-full show-when-local-storage="devtools” dev-1ibs</import-nap-overrides-full>
</body>
</html>
- Here all application’s location needs to mention under ‘systemjs-importmap’ along with the short name of the application
- Here already “@bacancy/root-config” is defined with the location “//localhost:9000/bacancy-root-config.js”
- In this way, the ‘bacancy-root-config’ file will be loaded and hence all registered the applications
index.ejs
- EJS stands for “Embedded JavaScript”.
- It allows generating of HTML dynamically with its own defined syntax and tags
- This file is used in “webpack.config.js” as follows

return merge(defaultConfig, [
  // modify the webpack config however you'd like to by adding to this object
  plugins: [
   new Htmlhebpackplugin({
     inject: false,
    template: "src/index.ejs"
   templateparaneters: {
     islocal: webpackConfigEnv & webpackConfigEnv.isLocal,
     orgNane,
    }
   })
   ]
  })
}
microfrontend-layout.html
- There are different ways to register, load applications based on URLs,
- This file can be said in HTML format to define the routes and location to load for that path here (similar router config of Angular applications)
- Here in the above format, we need to add path and application to load, based on active path matching application will be loaded
- Here we can also define the Default application in case none of the paths are matched i.e 404/login page
webpack.config.js
Webpack is a tool for bundling application code in chunks along with customization and for loading that code from a server into a browser.
Step 2: Run Root / Wrapper Application
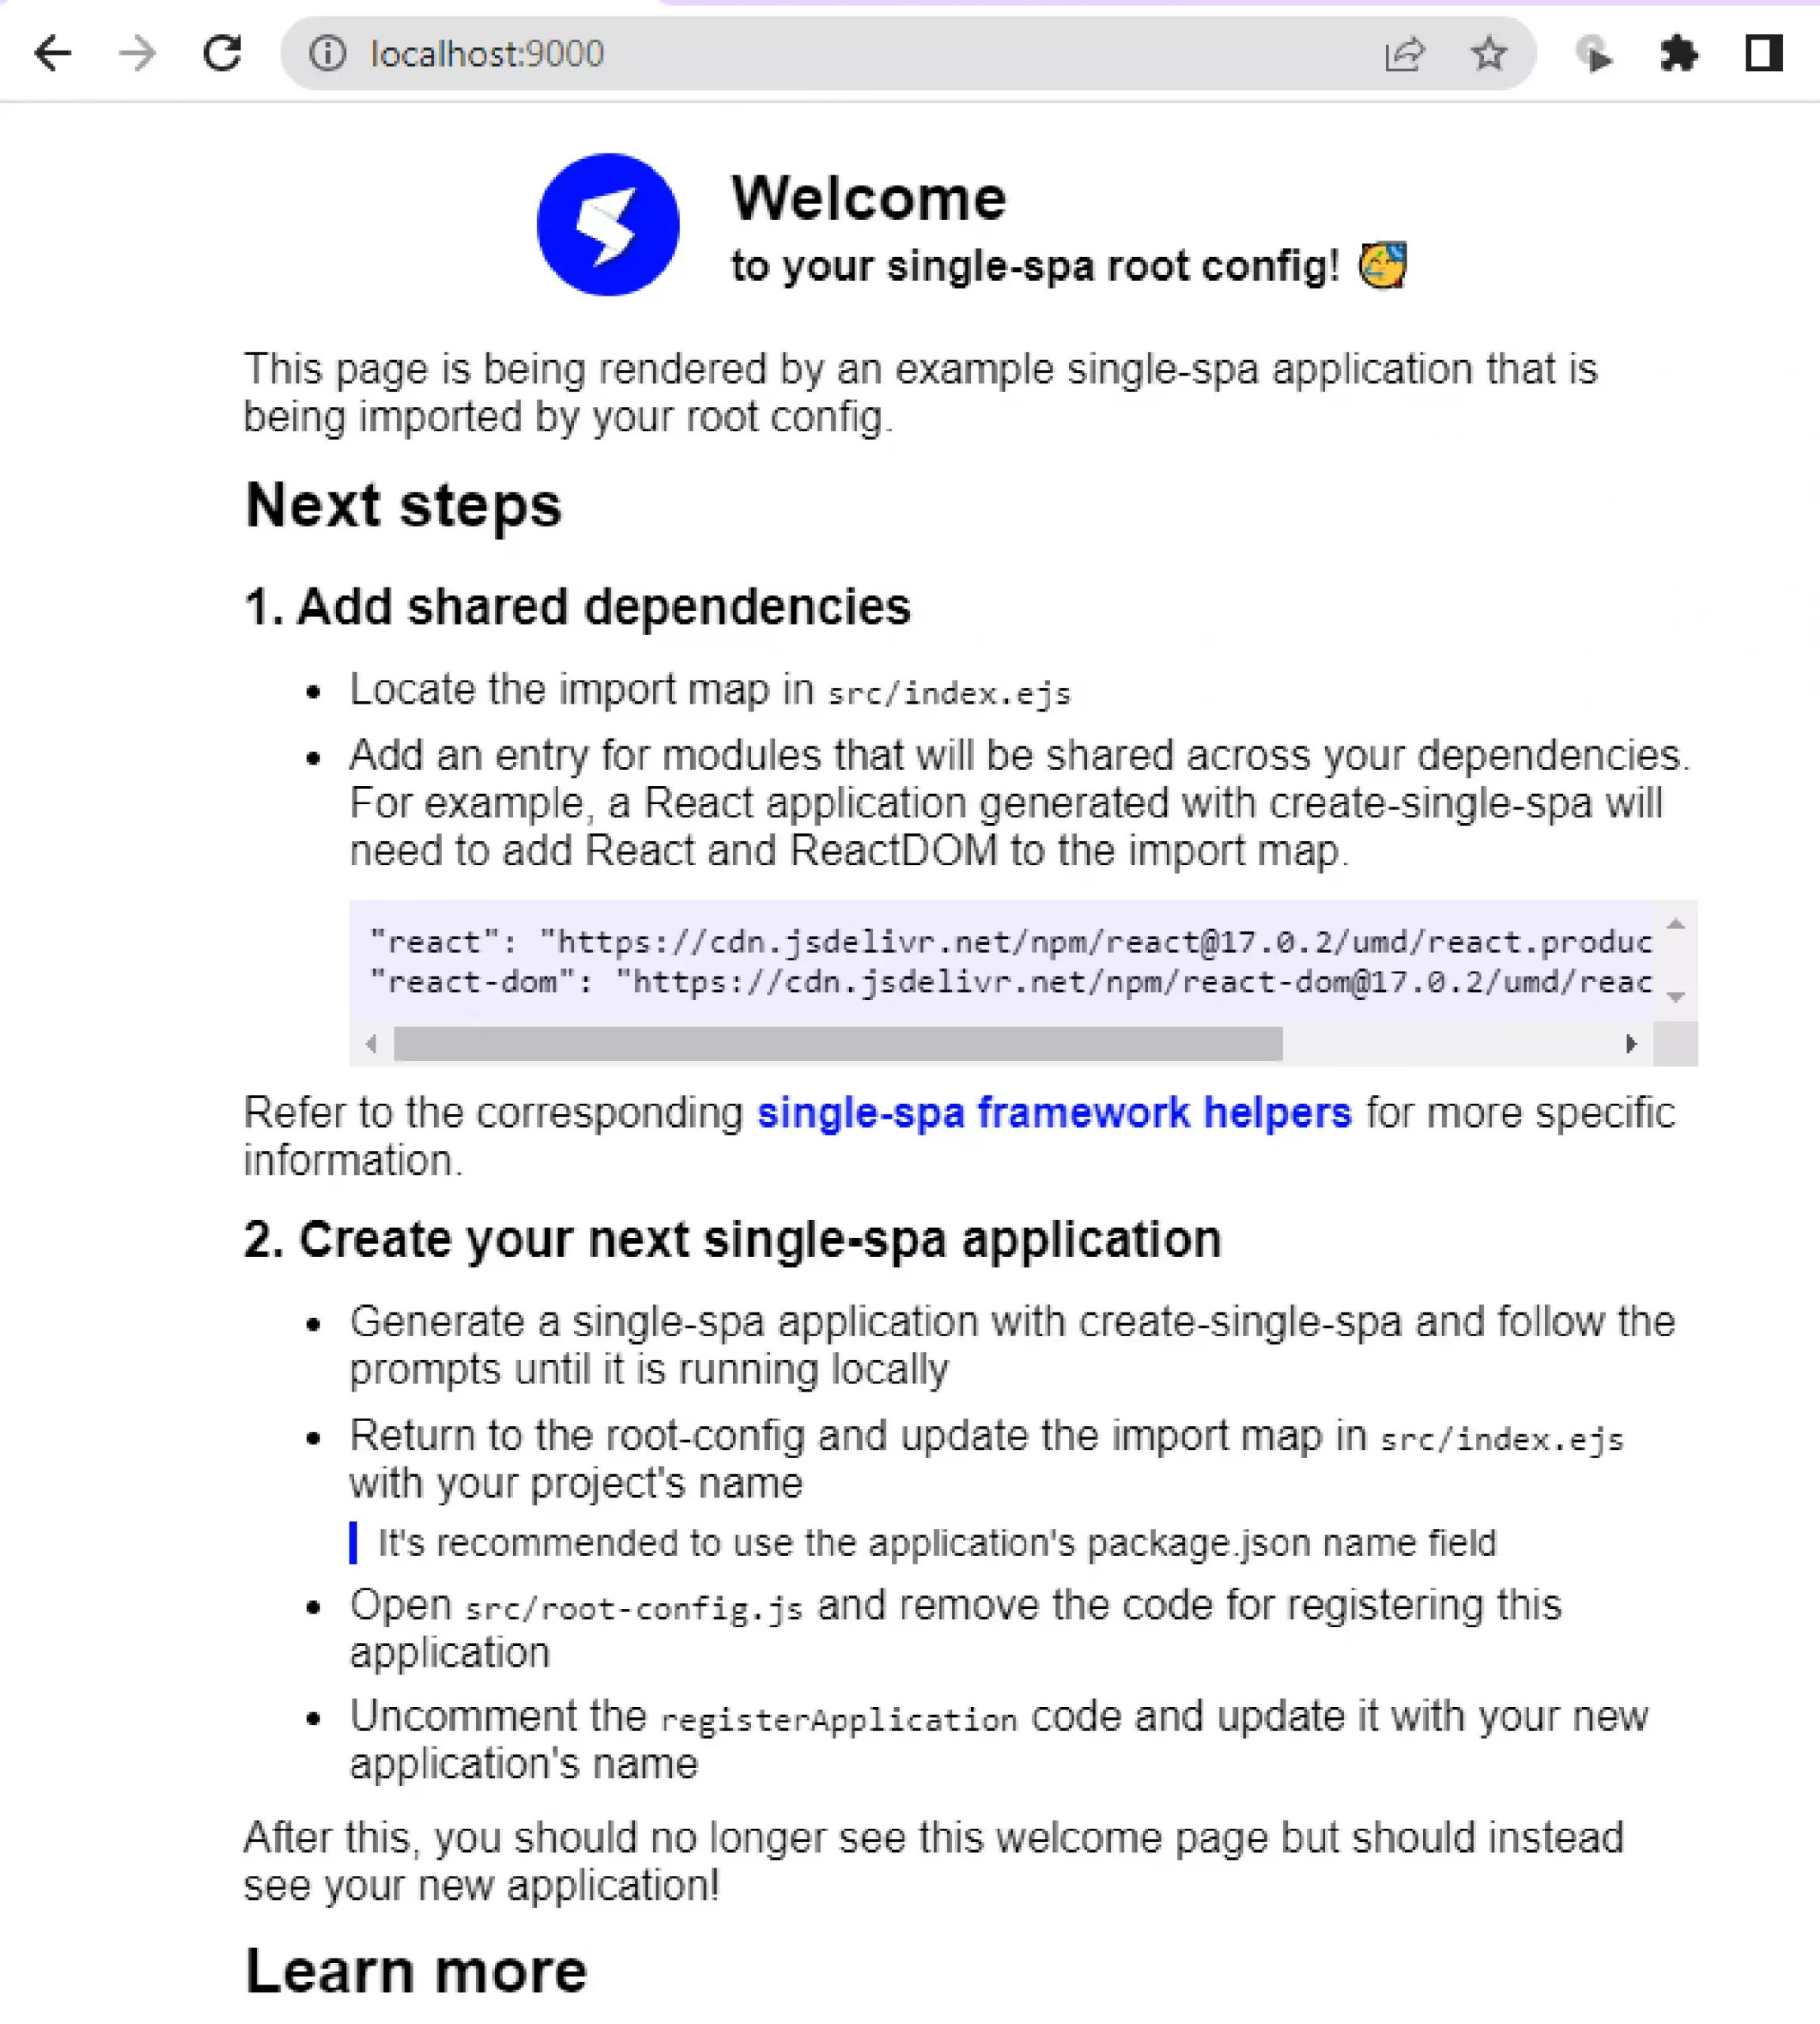
Executing the command “npm start” from the “root” directory will start the sample application of single-spa as below:

Step 3: Add Existing Apps in Angular Micro Frontends Architecture
Follow the below steps to add the existing application for Microfrontend Architecture:
Open the “Admin” application code:
Install packages by running Command:
Add a “single-spa-angular” library to your project:
As the command output shows some of the files are added and some are updated, below are the details of individual changes:
- A new file “extra-webpack.config.js” is added at the root level of the project that is a custom webpack config for SPA
- A new file “main.single-spa.ts” is added within the src directory that and this file will be new the entry point of the application(main.ts will be ignored)
- A component “empty-route” will be created within the src directory
- A new file “asset-url.ts” will be created under src/single-spa that used to load assets from a dynamic location
- A new file “single-spa-props.ts” will be created under src/single-spa that is used to add custom properties and it’s used in “main.single-spa.ts”
- The “package.json” file will be Updated by adding:
➡ devDependencies
➡ dependencies
➡ scripts - The “tsconfig.app.json” file will be Updated by:
- The “angular.json” file will be Updated by:
➡ For the Production build, the Application builder changed to “@angular-builders/custom-webpack: browser”
➡ For development, The application builder changed to ” @angular-builders/custom-webpack:dev-server”
➡ Entry file changes to “src/main.single-spa.ts”
➡ Adding custom webpack configuration
➡ Adding “src/main.single-spa.ts” and removing the “main.ts” file from the compilation
Manually need to add “APP_BASE_HREF” in “app-routing.module.ts” as follow:
That’s it, Follow the above steps in all existing projects where Microfrontend Architecture needs to be created.
Step 4: Integration with Root / Wrapper
Now we just need to integrate all Applications with the Wrapper project by adding its config in the “systemjs-importmap” section

<script type="systemjs-importmap™>
  {
    imports”: {
    “@bacancy/admin”: "//localhost:4261/main. js",
    “@bacancy/network”: "//localhost:4202/main. js",
    “@bacancy/sales™: "//localhost:4263/main. js",
    “@bacancy/root-config”: "//localhost:986e/bacancy-root-config.
    “@single-spa/welcome™: "https: //unpkg.con/single-spa-welcome/dist/single-spa-welcome. js",
    “single-spa-layout”: "https://unpkg.con/single-spa-layoutgl.e.0-beta.2/dist/systen/single-spa-layout.min.js"
  }
 }
</script> Remove this commented out code.
Here we have added the “@bacancy/admin”, “@bacancy/network”, and “@bacancy/sales” config with the server/port where applications are running.
Also, as we are using the Angular application, we need to enable ZoneJs, to enable just uncomment its script tag

<!--
If you need to support Angular applications, uncomment the script tag below to ensure only one instance of ZoneJS is loaded
Learn more about why at https://single-spa.js.org/docs/ecosysten-angular/#Zonejs
-->
<script src= https://cdn.jsdelivr.net/npm/zone.j56.11.3/dist/zone. min. js"></script>
Now, we need its route-wise application to load within “micro-frontend-layout.html” as below

<single-spa-router mode="hash">
<div class="main-content">

<route path
<application name="gbacancy/admin"></application>
</route>
<route path="netuork">
<application name="gbacancy/network”></application>
</route>

<route path="sales">
<application name="gbacancy/sales"></application>
</route>
<route default>
<application name-"gsingle-spa/welcome”></application>
</route>
</div>
</single-spa-router>
That’s it! Your basic Micro Frontend Architecture Angular-based application is ready.
Step 5: Run the Application
- Run Root Project by “npm Start”.
- Run Admin project with “ng s –port 4201”.
- Run Network project with “ng s –port 4202”.
- Run Sales project with “ng s –port 4203”.
Note: You can also find the above solution on our GitHub Repository.
Conclusion
This is what we had in our pandora box for the Angular Micro Frontends. We hope that after reading this blog post you have gained the conviction that Micro Frontend Angular is the ideal approach for your next web application development. But, still, if you are a business owner and confused if it is the ideal choice for your project based on your needs and requirements then, Hire an Angular Development Company like Bacancy to help you decide and guide you throughout your web application development journey.
Frequently Asked Questions (FAQs)
Micro Frontends Angular can communicate with each other through APIs, events, or shared services. APIs allow modules to exchange data and functionality, while events enable modules to trigger actions or respond to changes in the application state. Shared services provide a way for modules to share data and functionality without coupling them together.
Angular Micro Frontend is an architecture pattern for front-end development, while microservices is an architecture pattern for back-end development. Microservices involve breaking down the application into small, independently deployable services that communicate with each other through APIs. While, Angular Microfrontend involves breaking down the front-end application into small, independently developed, and deployed modules that communicate with each other through APIs, events, or shared services.
Some common challenges of Angular Micro Frontend include managing module dependencies, ensuring consistency across modules, dealing with versioning and compatibility issues, and coordinating deployment and updates across multiple modules. However, these challenges can be addressed through careful planning, communication, and best practices such as modular design principles and automated testing and deployment processes.
Yes, Micro Frontends can be used with other front-end frameworks as long as they can communicate with each other through APIs, events, or shared services. For example, you can use React, Vue.js, or other frameworks alongside Angular Micro Frontend to build a hybrid application.
Your Success Is Guaranteed !
We accelerate the release of digital product and guaranteed their success
We Use Slack, Jira & GitHub for Accurate Deployment and Effective Communication.


