VueJS is a robust and most progressive Javascript framework used for developing dynamic and excellent front-end applications. VueJS is also famous for building SPAs (Single Page Applications). Rather than rendering pages from the back-end, VueJs provides a routing library to manage UI from the frontend itself. This leads to better user experience and improves application responsiveness.
In this tutorial, we will learn how to implement Vue Router with our simple Single Page Application. We will develop a small demo app which will have a few pages linked through Vue Router. I’m assuming that you’re already familiar with VueJS. So, let’s begin our journey!
Why do we need Vue Router?
Routing is a very basic need to be implemented in any project. It helps link the views with their URLs. Every modern framework allows you to implement routing. VueJS provides the Vue Routing library for linking components to routes.
Building SPAs with the help of VueJS is one of the biggest advantages. SPAs are interactive because the pages don’t reload when the URL changes.
For building SPA you’ll need Vue Router.
Routing can be classified in two types-
- Server Side Routing- client requests server whenever the route changes
- Client Side Routing- client requests server only on the initial page load. Further, all the route related changes are handled by the client.
Vue Router: Tutorial Goal
We will build a demo blog application which will consist of posts (title/description) and comments (related to the post). We will retrieve data using axios. And for that these APIs are used –
- To fetch posts –
https://jsonplaceholder.typicode.com/posts.
- To fetch post details of post 1 –
https://jsonplaceholder.typicode.com/posts/1.
- To fetch comments of post 1 –
https://jsonplaceholder.typicode.com/comments?postId=1.
Each row consists of a blog post. On clicking the blog, we will be able to view comments and post details.
Vue Router Example: Steps to Implement Basic Vue Routing
We have divided the steps into three sections-
- Project Setup
- Create Vue components
- API Implementation
Follow this step-by-step guide to implement Vue Routing.
1) Project Setup
- Install vue-cli
npm install --global vue-cli
- Create a new project
vue create vue-router-example
When the questions are prompted on your terminal, ensure your answer is “yes” for vue-router installation.
- Install dependencies
cd vue-router-example
npm install axios bootstrap-vue
- Run the server
npm run serve
After running the above command, you’ll see the default screen on http://localhost:8080/.

2) Create Vue Components
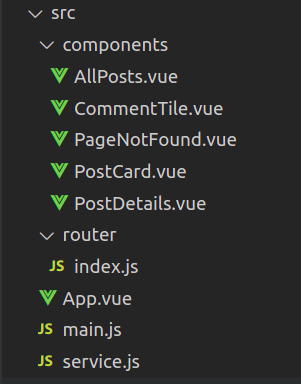
Before moving forward, have a look at the folder structure of vue-router-example

(Folder structure can vary from person to person)
Note down the file names and copy-paste the code, respectively.
Let’s start with setting up the routes. Open router/index.js
router/index.js
Import vue-router package to navigate the components. There are in-total five routes to implement but here in this section we will cover the first two routes for setting up the basic routing.
import Vue from 'vue'
import VueRouter from 'vue-router'
import Posts  from "../components/Posts.vue";

Vue.use(VueRouter)

const routes = [
 {
   path: '/', redirect: '/posts'
 },
 {
   path: '/posts',
   component: Posts,
 },
]

const router = new VueRouter({
 mode: 'history',
 base: process.env.BASE_URL,
 routes
})

export default router
Explanation
‘/’ defines the default view, here Home page. We will redirect ‘/’ to ‘/posts’ which will display component Posts.
Let’s have a look at our default UI. Open App.vue.
App.vue
The default UI will consist of Home Link and the views based on the routes hit.
On clicking Home the UI will be redirected to ‘/’ and display the respective component from file router/index.js.
< router-view /> maps routes with its respective component.
<template>
 <div id="app">
   <div id="nav">
     <router-link to="/">Home</router-link>
   </div>
   <router-view/>
 </div>
</template>
Now, moving towards individual components.
components/AllPosts.vue
AllPosts.vue is used for displaying all the posts.
<template>
   <div>
     <post-card :posts="allPosts"></post-card>
  </div>
</template>

<script>
import { Service } from "../service.js";
import PostCard from './PostCard.vue';

export default {
 components: { PostCard },
 name: 'Posts',
 created() {
   this.getAllPosts();
 },
 data() {
   return {
     allPosts: [],
   }
 },
 methods: {
   getAllPosts() {
     Service.get(`posts`)
       .then(res => {
         this.allPosts = res.data;
       })
       .catch(error => console.log(error));
   },
 }
}
</script>
Explanation
We have imported
- PostCard from /PostCard for displaying single posts.
- Service from service.js to access the remote data using Service.get(‘posts’). On resolving the promise, we will store the response in the array named allPosts and if the promise is rejected then we will simply console the error.
Now let’s see what PostCard.vue component?
components/PostCard.vue
<template>
 <div>
   <b-card
     v-for="post in posts"
     :key="post.id"
     :style="{ backgroundColor: background(post.id) }"
     class="post"
   >
     <b-row class="row1">
       <p class="title">
           Title - {{ post.title }}
       </p>
       <p class="body"
         :title="post.body"
       >
         Description - {{ post.body.slice(0, 70) + "..." }}
       </p>
     </b-row>
   </b-card>
 </div>
</template>

<script>
export default {
 name: "postCard",
 props: ["posts"],
 methods: {
   background: function(postId) {
     return postId % 2 == 0 ? "#B5E0D9" : "#FFE6E6";
   },
 },
};
</script>
We have used < b-card />, < b-row />, and < b-col /> from the bootstrap-vue.
All the posts will be displayed using posts prop with Post Title and Post Description.
3) API Implementation
Moving towards API implementation using axios in the service.js file.
service.js
Import ‘axios’ to fetch the data from the base URL – https://jsonplaceholder.typicode.com/
We are creating an instance of axios using the ‘create()’ method where the resource is accessed via baseURL prop.
import axios from 'axios';
export const Service = axios.create({
 baseURL: `https://jsonplaceholder.typicode.com/`
})
After implementing the Basic Routing with the help of Vue Router the UI so far will look like this (excluding style) –

Now, let’s implement dynamic routing.
Dynamic Routing using Vue Router
On clicking a specific post, we want post details to be displayed. And to fetch data we will use post.id of that particular post.
Create one component named PostDetails and make a few changes in router/index.js and PostCard.vue
router/index.js
 {
  path: '/posts/:id',
  component: PostDetails
 },
Now, whenever route ‘/post/:id’ will hit, the PostDetails component will render. As said before, on the click of any post title, we will send its id to the route. To implement this, open file PostCard.vue and write this code.
components/PostCard.vue
<p class="title">
   <router-link
     :to="'/posts/' + post.id"
    >
      Title - {{ post.title }}
    </router-link>
</p>
Moving towards the PostDetails component.
components/PostDetails.vue
<template>
 <div>
   <b-container
     :style="{ backgroundColor: background(this.postId) }"
     v-if="postDetails"
   >
     <b-row>
       <b-col cols="12">
         <h2>{{ postDetails.title }}</h2>
       </b-col>
     </b-row>
     <div class="postBody">
       <b-row align-h="center">
         <b-col cols="10">
           <p>{{ postDetails.body }}</p>
         </b-col>
       </b-row>
     </div>
     <b-row>
       <b-col cols="12" class="commentTitle">
         <h2 style="font-weight: 500">Comments</h2>
       </b-col>
       <comment-tile :comments="allComments"></comment-tile>
     </b-row>
   </b-container>
   <h3 v-else>Loading....</h3>
 </div>
</template>

<script>
import { Service } from "../service.js";
import commentTile from "./CommentTile.vue";

export default {
 name: "PostDetails",
 components: {
   commentTile,
 },
 mounted() {
   this.getPostDetails();
   this.getComments();
 },
 data() {
   return {
     postId: this.$route.params.id,
     postDetails: null,
     allComments: [],
   };
 },
 methods: {
   getPostDetails() {
     Service.get(`posts/${this.postId}`)
       .then((res) => {
         this.postDetails = {
           ...res.data,
         };
         this.getUserDetails(this.postDetails.userId);
       })
       .catch((error) => console.log(error));
   },
   getComments() {
     Service.get(`comments?postId=${this.postId}`).then((res) => {
       this.allComments = res.data;
     });
   },
   background: function(postId) {
     return postId % 2 == 0 ? "#B5E0D9" : "#FFE6E6";
   },
 },
};
</script>
Post details will consist of-
- post title
- post description
- post comments.
To display that we will use components from bootstrap-vue.
Two API calls are made from service.js.
- To fetch post details
getPostDetails() {
     Service.get(`posts/${this.postId}`)
       .then((res) => {
         this.postDetails = {
           ...res.data,
         };
       })
       .catch((error) => console.log(error));
 },
- To fetch post comments
 getComments() {
   Service.get(`comments?postId=${this.postId}`)
    .then((res) => {
      this.allComments = res.data;
    })
    .catch((error) => console.log(error));
 },
As we will be having a lot of comments related to single post we will create a separate component for displaying comments named CommentTile.vue
components/CommentTile.vue
The component will show the comments related to the respective post.
<template>
 <div>
   <b-col cols="12" v-if="comments">
   <b-col cols="10" v-for="comment in comments"
:key="comment.id" class="comment">
     {{ comment.body }}
   </b-col>
 </b-col>
 <h5 v-else>Loading....</h5>
 </div>
 </template>

<script>
export default {
 name: "commentTile",
 props: ["comments"],
};
</script>
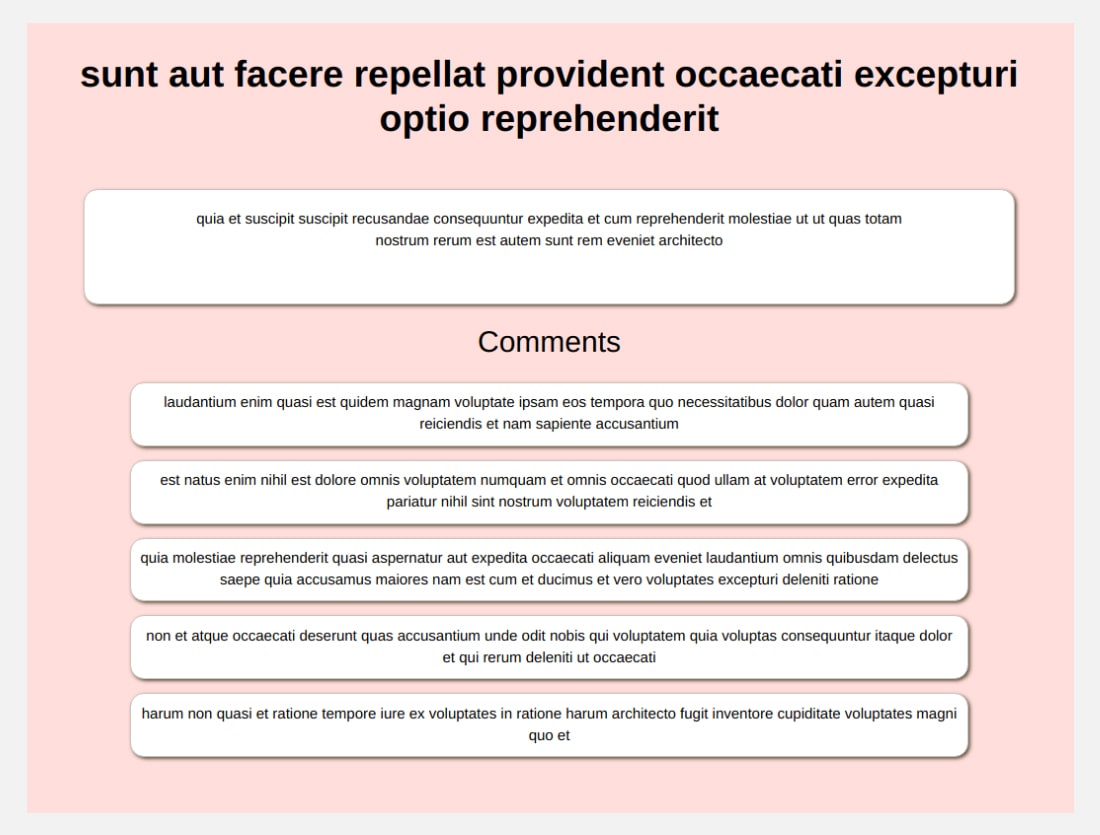
After implementing Dynamic Routing using Vue Router the UI will be something like this (excluding style) –

Heading towards the last section of Vue Router Tutorial – Implementation of Page Not Found.
Implementing Page Not Found
Create a component named – PageNotFound.vue inside components folder and make the required changes in router/index.js.
router/index.js
PageNotFound component will render whenever an invalid route hits.
 {
   path: '*', component: PageNotFound
 }
components/PageNotFound.vue
<template>
 <h2>You have entered the wrong url.
 Try going to <router-link to="/">Home Page</router-link>.
</h2>
</template>

<script>
export default {
 name: 'PageNotFound'
}
</script>
Conclusion
So, this was all about implementing a basic and dynamic Vue Routing tutorial with the help of Vue Router. I hope your purpose was served by landing on this blog post. You can learn more about VueJS by reading VueJS tutorials.
If you are looking for a helping hand for your ongoing or new Vue.js project, get in touch with us to hire VueJS developer of your choice with the desired skill set. We have 40+ dedicated Vue.js developers available for hire.
Frequently Asked Questions (FAQs)
< router-link > component allows users to navigate in a Vue application. It contains to prop, which takes the target location and renders it as < a > tag with an appropriate href, by default, but if you want to configure it, you can use tag prop.
router.push is a method that is used for navigating to another URL. Because of this method, a new entry is pushed to the history stack, so whenever the user hits the browser back button, the previous URL will hit.
< router-link > calls router.push method under the hood, so whenever you write < router-link to="..." > it will execute as a router.push(…).
Whenever your application has more than one page displayed on hitting the specific URLs, you should use a router. For synchronizing the URLs and views in an application, you need a router. It’s a common need for almost all applications.
Get in touch
Scale up your remote team and execute projects on time
Popular Post
February 6, 2024
July 14, 2023